5th Gear Cog Change
From THE Corrado Forum Knowledge Base
Corrado 02A Manual Gearbox 5th Cog Swap
Due to the age of our Corrados and the progression of motoring most of us now find that motorway cruising is not as relaxed an affair as it should be due to excessively high engine revs compared to more modern cars, especially those with 6 speed gearboxes. During the course of my engine build for my 16vG60 I decided that a engine speed of around 3500 rpm at 70mph was just too high. After doing some digging I found an article that stated you could fit a mk III Golf Tdi 5th gear cog as a direct fit to the corrado box. This cog is found on the ASD type gearbox and results in a drop of around 300 rpm over the existing gear ratios. This means that is should be usable with standard engines, resulting in better fuel economy to boot.
What You Need
You will need the following:
02A 301 215 A - Rubber seal for gearbox end cover plate
N 101 430 02 - Bolts for the gearbox end cover plate (M7 x 20) you will need 5 of these
02A 311 361 M - 5th Gear Cog for an ASD gearbox ratio of 0.717
02A 311 158 R - 5th Gear 'change gear' cog, this has the syncro section on the top section of it
02A 311 115 E - Needle roller bearing for the 'change gear' cog
You will also need the following, depending on your gearbox type
02A 311 295 - Syncro ring, up to gearbox number 30 10 1 (See the gearbox info article in the wiki for more info)
OR
02A 311 295 C - Syncro ring, gearbox numbers 31 10 1 onwards
N 903 592 02 - M8 cheesehead bolt, self locking up to gearbox number 01 05 0, you will need two of these.
02A 311 324 A - Dished special washer for above M8 bolt, again you will 2 of these.
OR
02A 311 335 D - M10 Torx head bolt from gearbox number 02 05 0 onwards you will need 2 of these.
02A 311 324 C - Dished special washer for above M10 bolt, two of these are needed.
Getting Started
The first thing you will need to do ideally is remove the gearbox from the car, this makes the work a lot easier although it may be possible to do this with the gearbox in situ on the car.
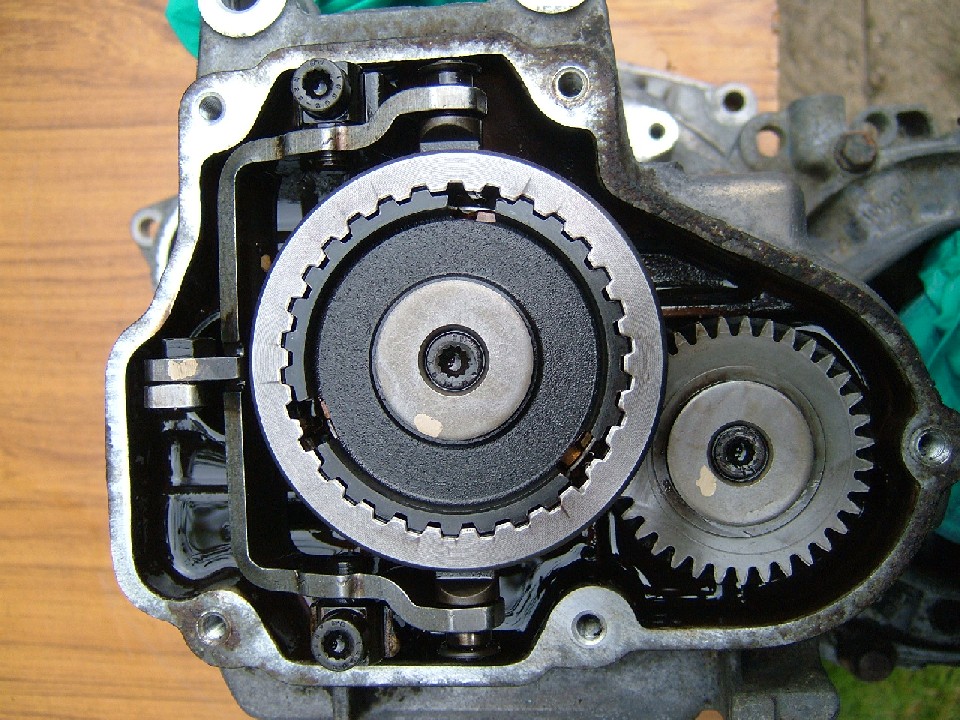
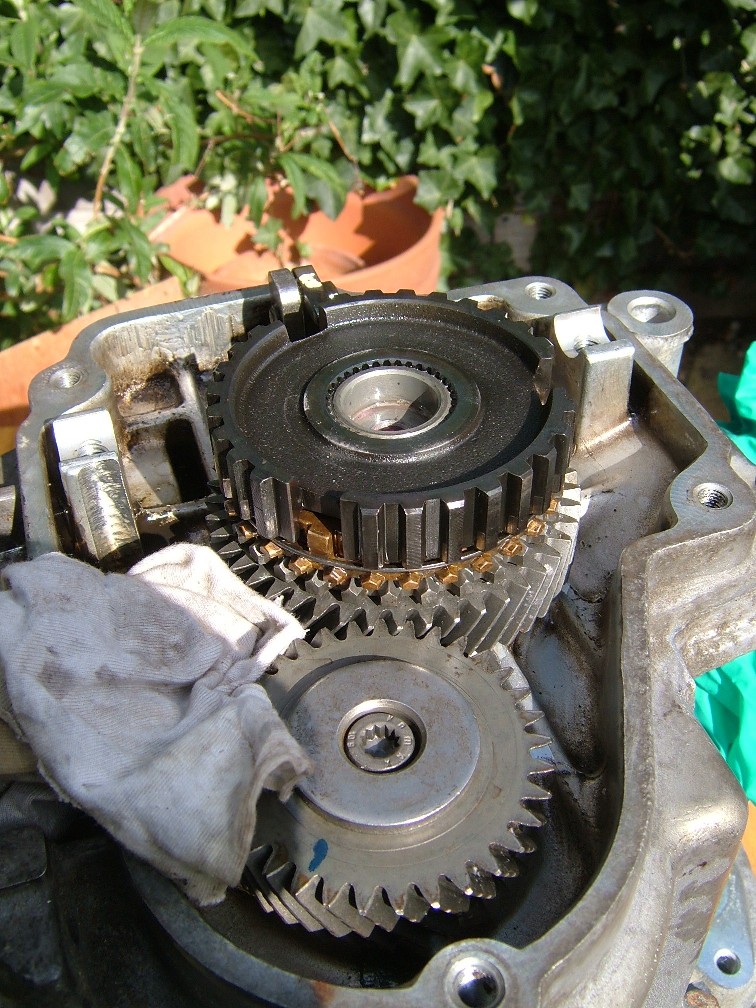
The first job is to remove the end cover plate, there are 5 bolts holding it, it is easily identified by the black casing at the opposite end of the engine (offside) with a VW logo embossed on it. After removing that you should see something like this:
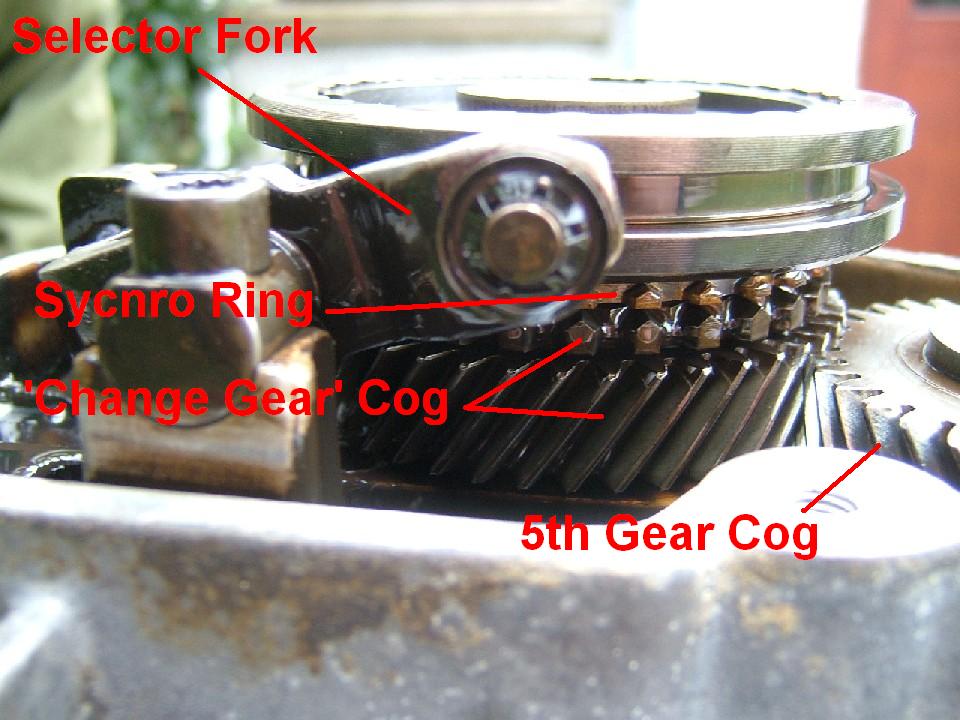
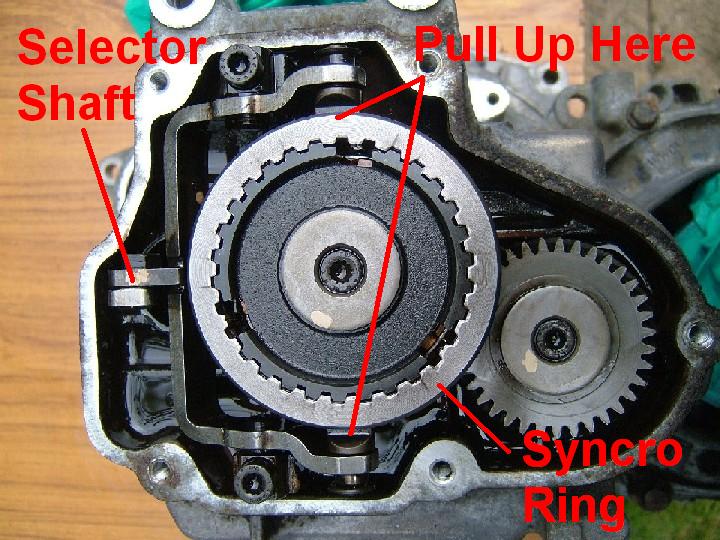
The next pic shows a side view and details the selector fork and gives a good overview of the syncro mechanism.
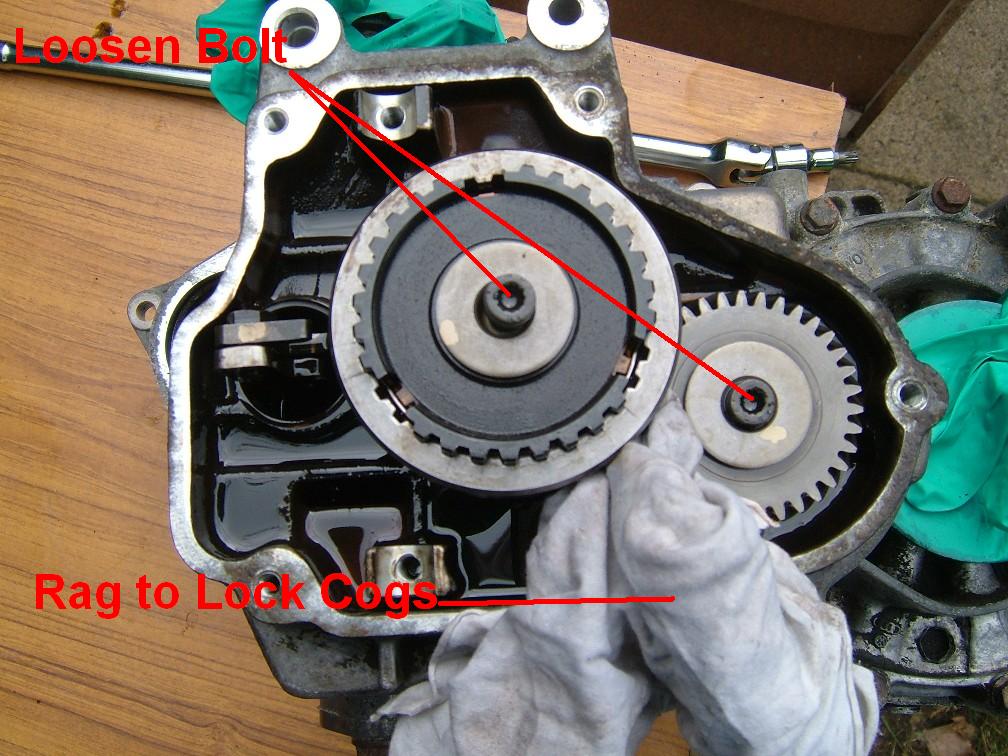
Your first priority is get the two spline bolts that hold the cogs in place undone a bit, I used a bit of old cloth to stop the gears rotating against each other and provide a locking mechanism to undo them. The bolts on the M8 type are 40nm of torque and the M10 type is 80nm of torque to give you an idea of the force required to undo the bolts. I would just start one moving and then do the other one to ensure you have no movement on the 'loose' gear when you undo the last one.
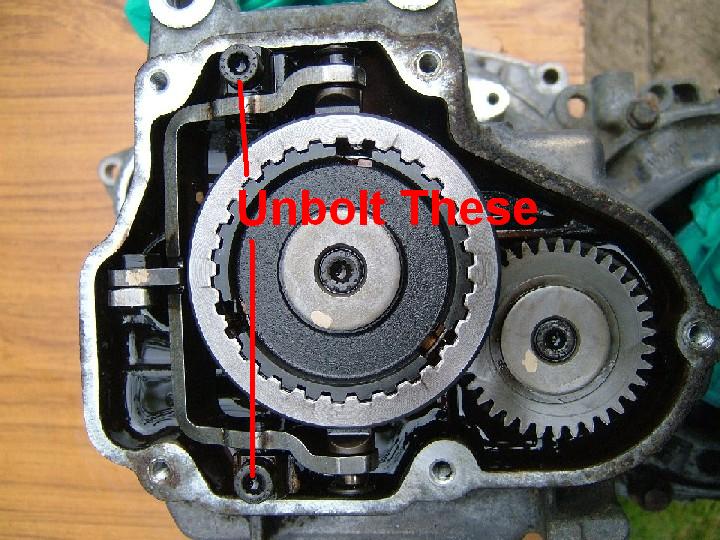
The next task is to unbolt the syncro fork mechanism, this is held in by 2 spline drive bolts, as shown in the picture below.
You then need to pull up on the syncro collar to remove it and this will also free the selector fork. Please note the selector shaft marked in this picture, the selector fork engages in a 'C' shaped bracket at the selector shaft end and will need to be lifted clear of this when the syncro collar is removed.
You should then see something like this
Remove the rest of the syncro gear by using a puller, you may be able to do it using screwdrivers but it is much easier with a puller. You can place the puller under the syncro ring as shown in the previous pictures or above it.

You can then remove the syncro ring by hand, it may need to be levered with a flat bladed screw driver just to get it start.
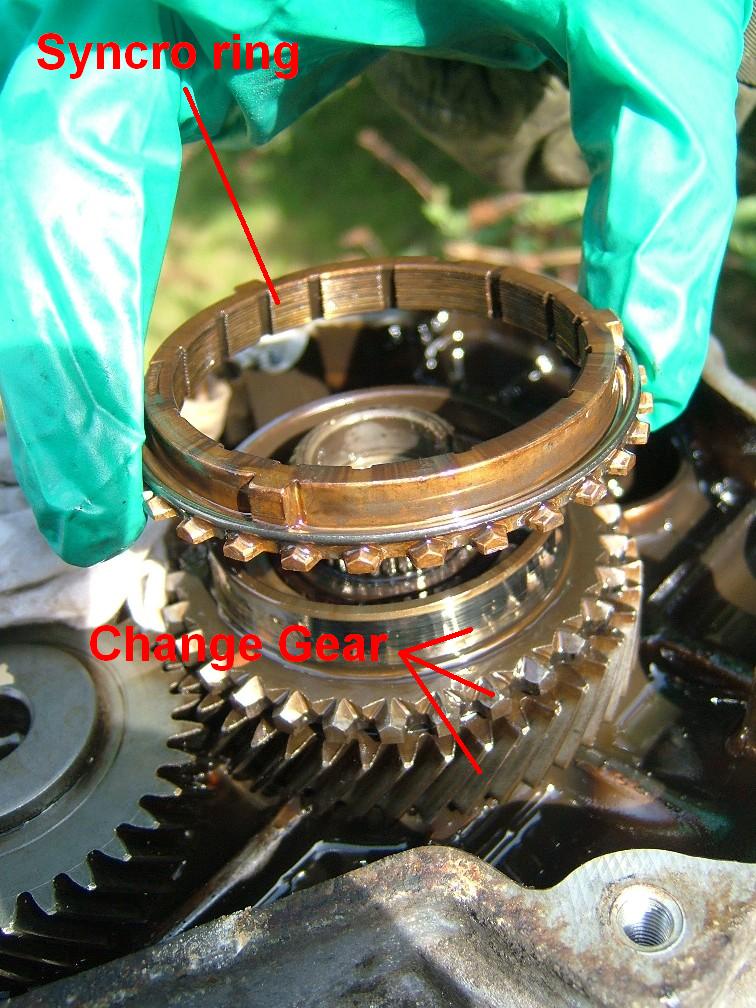
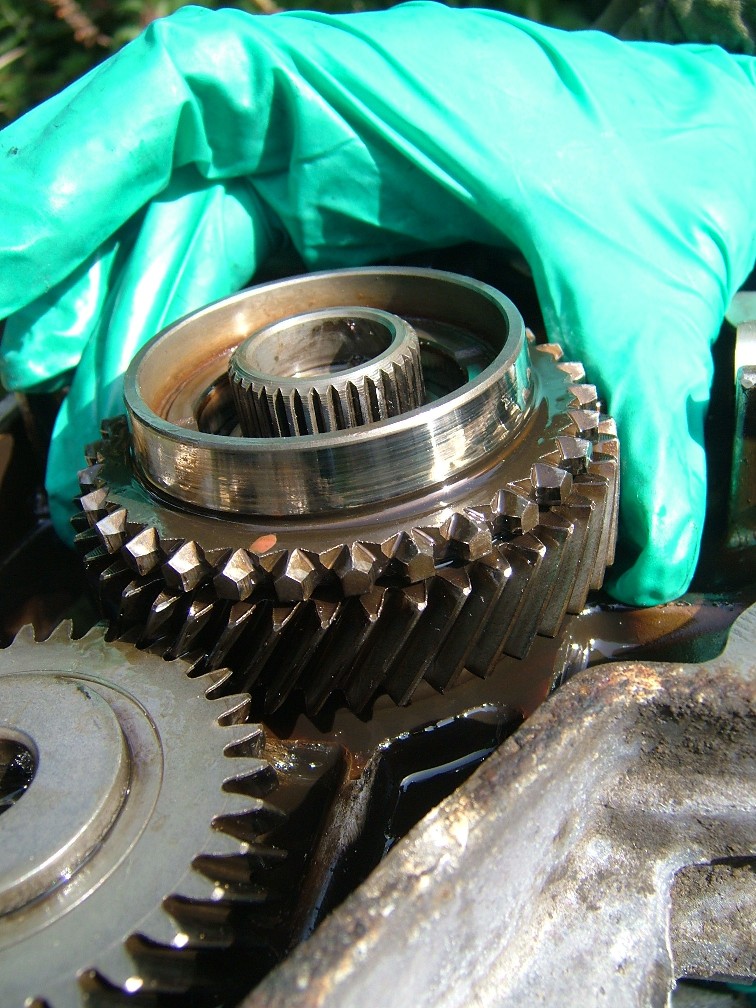
Then pull up on the change gear, this is not fixed and should come off easily.
--Yandards 23:59, 07 April 2007 (BST)