FMIC fitment guide
From THE Corrado Forum Knowledge Base
Large Intercooler Fitment Guide – Prepared by G-werks 04-10-2006
This is a guide on fitment of a large “rallye style” intercooler into a corrado/mk2 Chassis, It is not intended as a step by step guide on fitment as I may of forgotten a few bits here and there but it will guide you and give you an insight into how to squeeze one into the hole in front of you radiator.
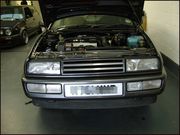
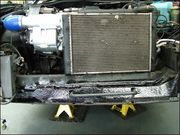
This is what you should have to start with. Secure the vehicle on axle stands before any work commences.
Step 1 – Remove all inner arch’s & bumper, 4xm12 fixings into the bottom of the chassis legs will let the bumper pull away from the front of the car, you will then need to unplug the indicator/fog light plugs to remove completely.

Step 2 – Remove slam panel, this is held on via 14 self taper style fixings situated around the slam panel.

Step 3 – There is the stock intercooler located in the N/S chassis leg.
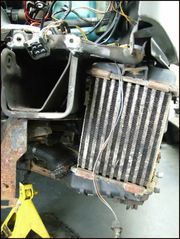
Step 4 – you can now see the intercooler in all its glory (impressive isn’t it?) To remove from vehicle there are 3 fixings. 2 of these can be found at the back (m5) and one at the top front (m6)

Step 5 – You can now remove all of the pipe work and relative fixings and remove them to that box that can be stacked in the back of your garage/workshop for many years to come.
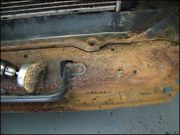
Step 6 – You Slam panel could quite possibly look like this? If it does just stand back for a second crack open a beer and then reach for your wire brush. Clean all debris then apply some Cure rust treatment and a good coat of hammerite and it will remain solid for years.
Step 7 – Now ready to start the interesting part of this project.
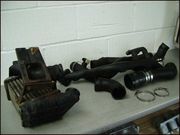
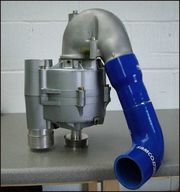
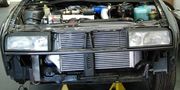
Step 8 – This is the pipe work from the supercharger to the inlet side of the intercooler. The supercharger doesn’t need to be removed I just removed it as I had to fit an oil cooler also (ill do a write up on that later) All of these intercooler kits can be fitted with superchargers in position. Parts here are, U-bend,76mm-63mm reducer, 63mm 90* elbow, ally joiner.
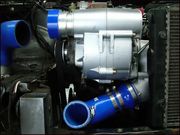
Step 9 – You can now start lining up all of the new shiny parts into the engine bay, some trimming of silicone hose may be required so trim as necessary (being very careful kids).
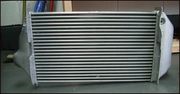
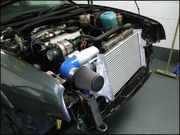
Step 10 – Well here she is, the new intercooler I think you will agree a slight improvement over that standard small oily thing you removed 20 minutes ago.
Step 11 – The intercooler can now be fitted into position on the lower slam panel in front of the radiator, note the 2 location holes, one to the right of the radiator and one on the lower section of the slam panel. You need to remove the locating tab to the side of the radiator to get the intercooler into its correct position. Once happy with the position you can connect up the hoses on the inlet side and secure the intercooler to the radiator.

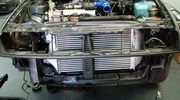
Step 12 – Race spec :)
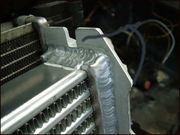
Step 13 – Here are some of the modifications I made to the casting to enable the corrado bonnet release cable to work freely, you also need to trim a small amount from the front to enable the slam panel to clear and the N/S headlight to clear the intercooler.
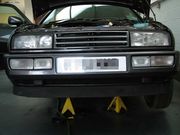
Step 14 – You can now refit you front panel making sure you have enough clearance for it to not foul on the intercooler and that the bonnet cable can move freely.(its very hard to open the bonnet if the cable snaps once this intercooler is fitted – Trust me I have the scars to prove it)
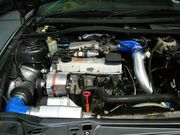
Step 15 – The pipe work from the intercooler to the throttle body should be a direct replacement for the pipes you have removed, Only things to make sure of here are the pipes are securely fastened and the CO pot is a good tight fit (don’t forget the o-ring)
Step 16 – Headlights, inner arch’s and other fittings can now be cleaned and refitted.
Step 17 – Once having a check over all of you work and making sure everything’s tight you can now refit the front bumper, This is when you can now open another beer stand back and appreciate your hard work and your near factory looking large intercooler install (impressive how it fits in there so well I hear you say.)
Well there you go a rough insight on how to squeeze a large front mounted intercooler into that space in front of the radiator in the front of a corrado. If you wondering where the O/S wheel is unfortunately a cheap wheel adapter decided to leave its thread on one of the wheel bolts so there another job to be sorted.

The end.
Darren Bennett