Jump to content
Sign in to follow this  
  • entry
    1
  • comments
    93
  • views
    908

That Rado...........

Sign in to follow this  
C488ADO

58,141 views

WELL..im back new motor and new project....

this one is a keeper i have always liked vw's and i really cant be arsed to buy / sell any more cars.... so this one is here to stay, i do have some long term projects in mind for it , it wont be totally mint like concours but it will be tidy daily driver standard, not sure if it will be good enough to show but il like it all the same....


as with any project i undertake time and money hold them up so i will update this as much as i can along the way....
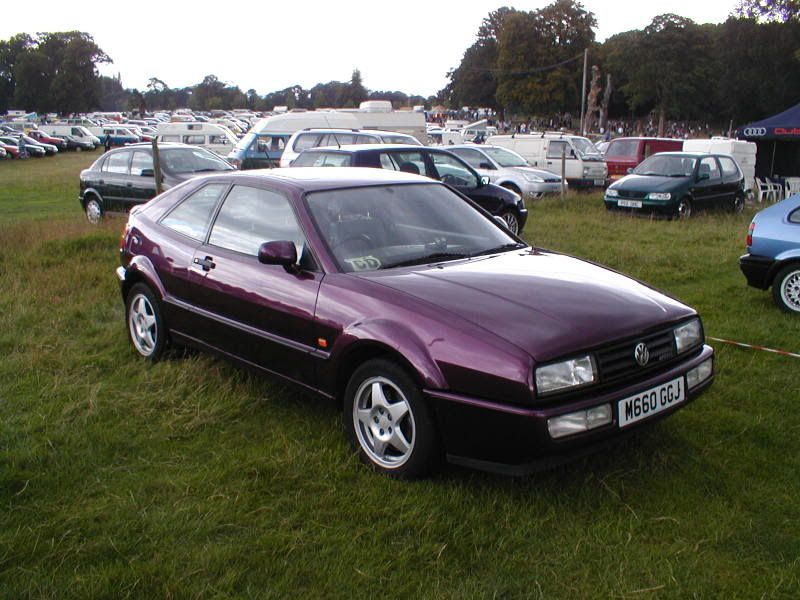


i have gone for a

volkswagen corrado vr6

colour is blackberry
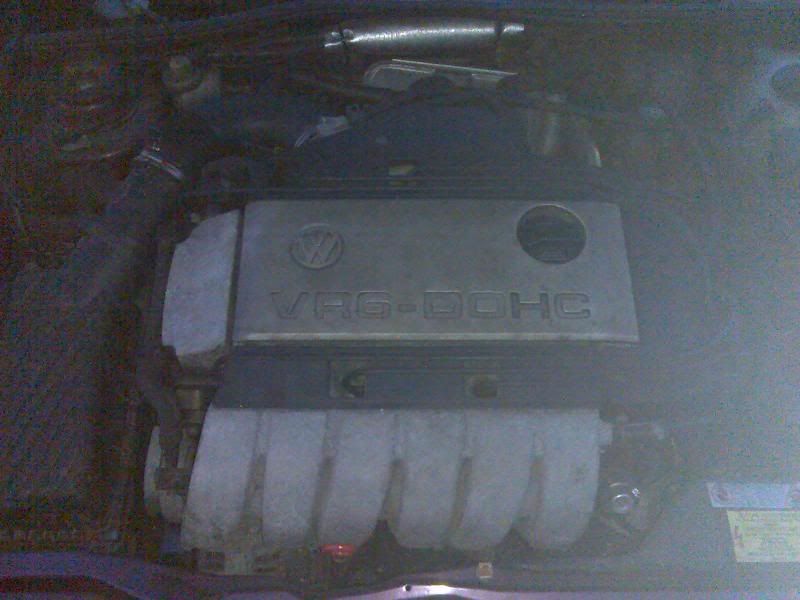
2.9 12v v6

AUTO!!!!!! (ahem this will change in the future..)


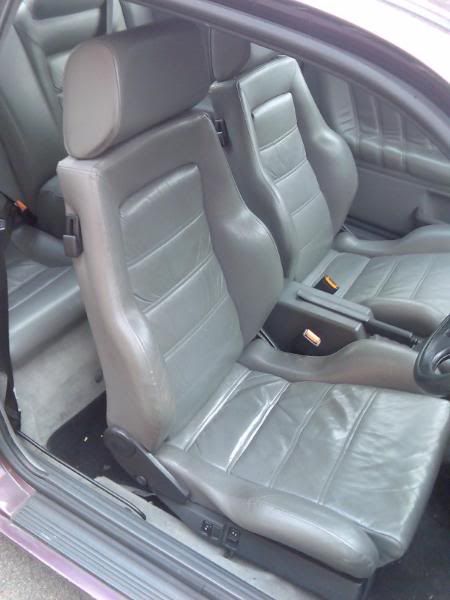
it is quite special really as it has electric heated leather recaro's from new...optional extra im lead to believe at the time i have also heard storys of insurance claims writing the cars off due to them being £4000 each to replace!! lol


it has the same spec as the storm model but it is a nicer colour and has the nicer interior... so in my opinion a better and nicer buy than a storm...


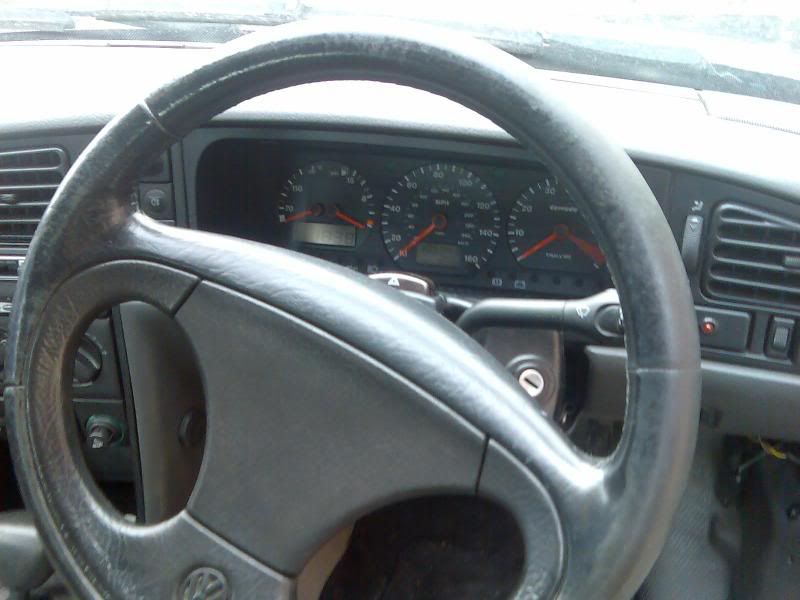
its just coverd 107,000 miles and has full anally retentive service history with a box binder abosolutly bursting with recipts etc etc


the body is quite tidy for the year and mileage and the interior again is tidy , i would like to spend some time on this later in the project getting it how i like it...


il post some pics up later on so you can see what its like cheers


nate


anyways here are a few pics of the sale adverts...


Corrado20VR620Auto.jpg


CorradoInterior1.jpg


CorradoInterior2.jpg


CorradoInterior3.jpg


Image015.jpg


Image016.jpg


Image022.jpg


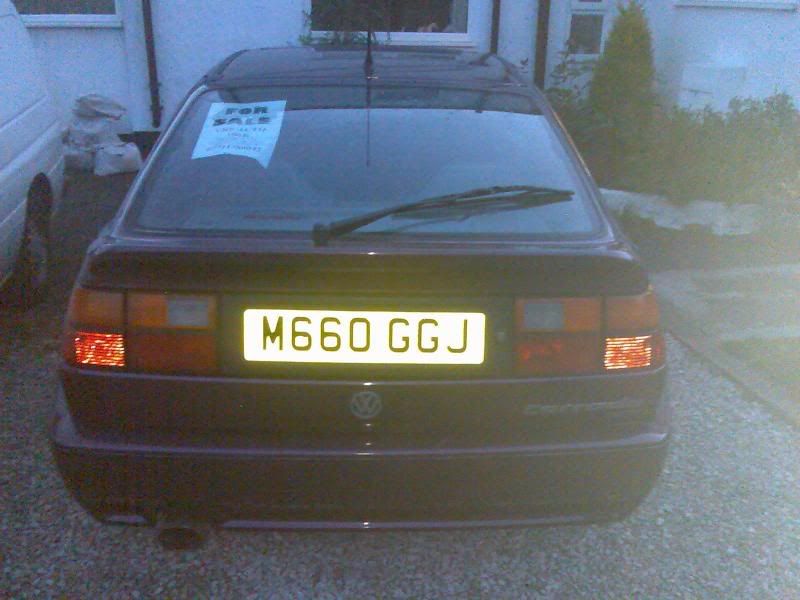
so that was the sale pics not great but you get the idea.....


i guess at this point i could tell you the difference between my car and the storm.


as i believe it the storm was a limited edition run of 500 cars, 250 were blue and 250 were green...

the blue storm had black leather while the green had beige leather


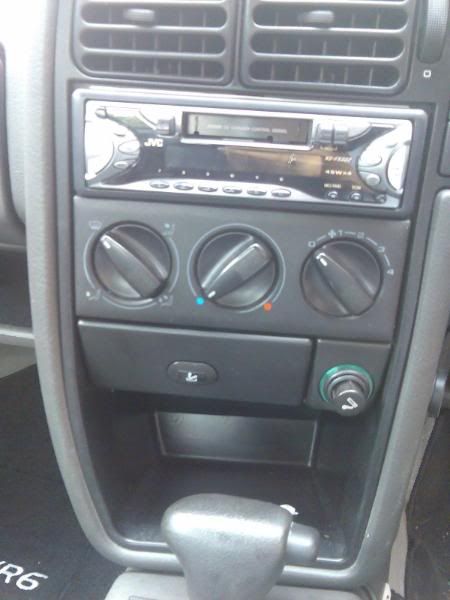
both cars were heated leather seats and that is the main difference... the only other spec difference is the strom badge on the rear of the car and a storm badge on the centre console.....the vr6 badge on the fornt and rear were chrome.


that is the complete difference between the corrados standard models and the storm...so it is possible to get a better specced corrado than a storm!! weird huh?


anyway.....


i like the way the standard car looks it has unusual lines and i think it is quite definitive in its age, there arnt too many around now and you really dont see them very often on the road, it is said that the corrado never really took off and was a vw flop but many many people disagree it handles superbly and the quality of the doors shutting and bonnet the interior really is very good, esp for a car of this age, the dissapointing factor of these cars is the performance... ok they are old they are fairly quick nothing like most cars of todays standards, they have a 2.9 12v v6 engine you would expect more horse power.... these only push out 190 bhp?????


crap really, they should of had a (schrick) vsr inlet manifold from the factory but volkswagen moved to opt out of this due to manufacturing costs so they sold the rights to schrick hence the name... this is basically variable valve timing for the vw!! similar to hondas version... this improves horse power and torque across the rev range and makes a very nice difference


on all models air con and headlight washers were optional....


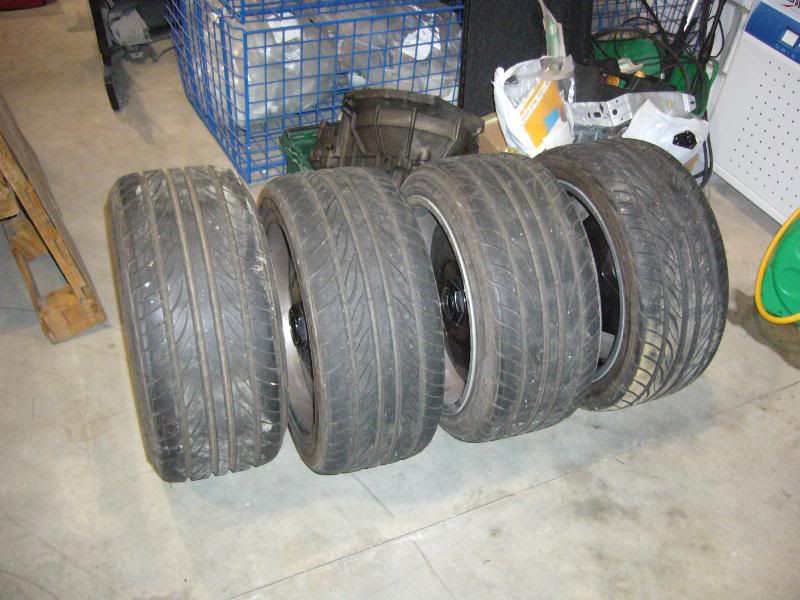
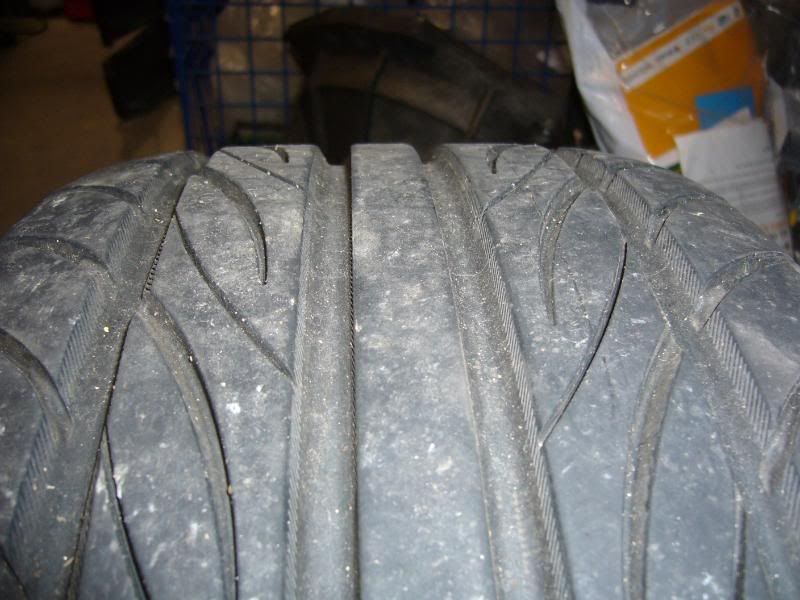
i bought these wheels before i picked the car up and i still think they are old but kinda cool looking.... retro cool....


these are also supposed to be quite rare as they are 5 stud fitment for vw.


Borbet A's


fronts are 16 x 7.5

rears are 16 x 9


P1030270.jpg


P1030269.jpg


P1030268.jpg

Sign in to follow this  


93 Comments


Recommended Comments


ok so my car hasnt been touched this week so i fed the meter some more money and hopefully all will be well underway soon............... :sad:

bit gutted as i had been really looking forward to some more updates..anyway i did get two of my wheels back today from having the lips polished...

i had this great idea of stripping the wheels back to bare metal

1)to help the painter out

2)to help the polisher out

3)to get a better finish


this didnt go to plan.... i used niotromorse and it really didnt have any effect on my rims it did however leave them very flacky and looking as though they should be binned and not refurbed.... it really was that bad..the alloy etching primer didnt want to budge and it looked awful.............


so ni went to Andy handshw polishing in Brixham and he is an absolute ledgend!!!!!!!!!!!!!

quote £20 per lip for the polishing £10-£20 per whell to strip back and make good ready for painting..


so got my cousin to pick them up for me today as i was real busy and Andy decided £50 all will cover the bill!!!

here are the results.........

before

P1030266.jpg

P1030264.jpg

P1030259.jpg


after.....

P1030612.jpg

P1030611.jpg

P1030613.jpg

P1030614.jpg

P1030615.jpg

P1030616.jpg

P1030622.jpg

P1030617.jpg

P1030620.jpg


the rears will be making there way back to Andy as soon as i have my new tyres.... to get the same treatment

Share this comment


Link to comment

had to have the tyres fitted today ,as i need to get the wheels back on the car asap so i can get the ride height dialled in just right, got to do this before any other body work commences just in case of the front arches might need some mods as the car is going to sit quite low i think........

the tyre i have gone for this time are 195/40/16 they are dunlop sp9000 look so much better than the toyo's....

P1030623.jpg

P1030624.jpg

P1030625.jpg


also the american spec third brake light turned up today so that will be fitted at some stage soon!!!

P1030628.jpg

Share this comment


Link to comment

ok a little update the ball is rolling now and come monday there should be some more updates!!

say goodbye to the nasty vw badge

P1030693-1.jpg

and the corrado badges

P1030694-1.jpg

and the swage lines..

P1030695-1.jpg

P1030696-1.jpg

P1030697-1.jpg

P1030701-1.jpg

P1030700-1.jpg

P1030702-1.jpg

P1030705-1.jpg

P1030707-1.jpg

P1030703-1.jpg

P1030706-1.jpg

P1030704-1.jpg

fitted one of the rims..... what colour shall i do them??

P1030698-1.jpg

looks like a barn find!!

P1030699-1.jpg

Share this comment


Link to comment

got a couple pics of the chequred spoiler today in a better light and a couple of the oettys on the rear... tucked....

i actually cannot go any lower with these rims as the tyre would bottom out on the actual arch in side!!

P1030763.jpg

P1030764.jpg

P1030765.jpg

P1030766.jpg

P1030767.jpg

P1030768.jpg

P1030769.jpg

P1030770.jpg


i really like this spoiler but it is so god damn hard to photograph....

in the light in the shop and the flash it make sit look whiter than it actually is ... weird....


anyway the oettys

P1030771.jpg

P1030772.jpg

P1030773.jpg

P1030774.jpg

P1030775.jpg

Share this comment


Link to comment

here is the hole in the tail gate ...

P1030803.jpg

P1030805.jpg

P1030806.jpg

bonnet washers welded up...

P1030807.jpg

P1030808.jpg

trial run.............

P1030810.jpg

P1030811.jpg

note the bracket inside for the light cluster.............

P1030812.jpg

P1030813.jpg

P1030814.jpg

P1030815.jpg

P1030817.jpg

P1030818.jpg

darren showing nigel his ninja death moves............

P1030816.jpg

Share this comment


Link to comment

few more updates not very interesting but its getting there...


drivers front wing no more stone chips!!! (no more paint....)

P1030891.jpg

P1030892.jpg

P1030893.jpg

passenger rear quarter

P1030894.jpg

dents in quarter and door removed...

P1030895.jpg

rear wiper removed

P1030896.jpg

P1030897.jpg

P1030898.jpg

P1030899.jpg

P1030900.jpg

P1030901.jpg

only got a pic of the one seat as the drivers one has gone for some new panels to be put in...

P1030902.jpg

P1030903.jpg

Share this comment


Link to comment

got a bit done today!!

got the carpets and took them to work they are minging, at one point i thought i need to source some new ones, but i thought id give what i always do a go and TFR them then pressure wash them here are the carpets...

P1030904.jpg

P1030905.jpg

closer pic of the rear section

P1030906.jpg

P1030909.jpg

closer pic of front section

P1030907.jpg

P1030908.jpg

note the black marks...

P1030910.jpg

i started with the smallest bit of carpet first, i sprayed on the tfr let it soak just a little then i just pressure washed them off throurghly, i didnt even scrub them

P1030911.jpg

its starting to look clean already!!

P1030913.jpg

this bit is just dirty

P1030914.jpg

all done!

P1030916.jpg

the fronts you can just about see the brown water coming off them!!

P1030919.jpg

P1030918.jpg

P1030920.jpg

P1030921.jpg


very happy with these results.. there are a couple of what looks like pink permanent marker stains which wont budge but i will get some grey mats to cover them up!!

Share this comment


Link to comment

the carpets just need a good wet vacing off now and the pile will be restored to its former glory!!

so on the way home i popped into ppi and got the sunroof trim off and aerial

P1030922.jpg

car has moved and is nearing the door!!! gonna be soon now!!

P1030923.jpg

bonnet with first coat of primer

P1030924.jpg

we finally managed to get the bumper off!!!

P1030925.jpg

front end now looks like this

P1030926.jpg

fitted the oettys to the front firstly to see how much room there is on the front arch and secondly had to see the 'stance'.....

P1030927.jpg

P1030928.jpg

P1030929.jpg

so with the thougth of fitting porsche brakes in the near future i had better take care of the front arches now while its in this stage...got to allow for maybe 10mm spacers.. to fit the calipers so panel berating the arches back is a good move i feel...

P1030930.jpg

P1030931.jpg

also took the opertunity to lower the car at the front some more....

starting to look right now peoples opinions please...

P1030932.jpg

P1030933.jpg

P1030934.jpg

P1030935.jpg

P1030936.jpg

P1030937.jpg


ben is going to sort the front arches out in the morning i.e filler shaping etc and then................yes then it is going into primer tomorrow after noon!!!!!

this means it will be painted by this time next week ?? hopefully!!!!

Share this comment


Link to comment

this is where the threads are on the front....

why am i showing you this i have no idea???


P1030942.jpg

P1030943.jpg


ben as promised sorted the front arches this morning...

P1030938.jpg

P1030940.jpg

P1030944.jpg

he also started work on the front bumper..


P1030941.jpg

car also went in for its primer today!! at last we here you cry....

P1030949.jpg

P1030950.jpg

P1030951.jpg

P1030952.jpg

P1030953.jpg

P1030954.jpg

P1030956.jpg

P1030960.jpg

P1030961.jpg

P1030962.jpg


apparently the roof doesnt need primer as there are no repairs needed to the roof so i guess that just gets keyed up and blasted??

the bonnet has already been primed and the tail gate will be done next... rear bumper is having some smoothing work done and then its in ...really looking like it will be painted next week now!!!!!

Share this comment


Link to comment

almost forgot...

got the rears back from polishing today i didnt get them totally stripped as ppi said they didnt need it they can make good whats there....


so what ya think he has done an awesome job yet again and the pair...£30.00

cany go wrong eh!


P1030980.jpg

P1030981.jpg

car now out of the oven and ready for final prepping... that will start monday i think?!


P1030982.jpg

P1030983.jpg

Share this comment


Link to comment

yep little by little we edge closer to completion!! :roll:

so the car has been blocked (start of the final preparation) and is just waiting to be gone over with 400 grit and then peopl ethen its going in the oven.....

who knows by saturday evening i might even be able to put up some pics of a shell that has got paint on it other than primer!!!!!


P1040001.jpg

P1040006.jpg

P1030998.jpg

P1030995.jpg

P1030994.jpg

rear bumper being worked on

P1030993.jpg

and the tail gate....

P1030996.jpg

P1030997.jpg

Share this comment


Link to comment

went there again today and jow was getting on with the final prep.. the car is going to be in the oven at around midday tommorrow!!! this is getting close the doors will be foff tomorrow and the slam panel should be prepped... anyway the last few pics before the colour is on!!

this is the car after it has been wet flatted all over...

IMAGE_051.jpg

IMAGE_053.jpg

IMAGE_054.jpg

tail gate hinges removed...

IMAGE_055.jpg

need to replace the clear sticker that goes around the door shut to stop the rubber taking the paint off....

IMAGE_056.jpg

also need to get hold of sharon@motormugs so they can duplicate these stickers....

useually if you produce a good enough image and dimensions they will make up any car sticker for you to look like the original and normally only charge £1.00 per sticker..... cool eh??!!


IMAGE_058.jpg

IMAGE_059.jpg

IMAGE_061.jpg

look at him go!!!

IMAGE_069.jpg


need to get some of these too....

IMAGE_070.jpg

Share this comment


Link to comment

car entres booth, gets wiped down with thinners i think and final finishing touches are taken care of ready for masking...

P1040075.jpg

P1040076.jpg

P1040077.jpg

P1040078.jpg

P1040079.jpg

P1040080.jpg

P1040081.jpg

P1040082.jpg

P1040083.jpg

Share this comment


Link to comment

here are a quick couple of pics of the porsche seats still got to be fitted yet but i think they will look awesome!!

P1040084.jpg

this is the one i had to have repaired as you can see they repaired all four bolsters £90.00............bargain!!

yes they are lighter shade of grey but i asked for that as they are being re-connolised......... they also replaced the pipeing...

P1040085.jpg

interior looks very sorry for itself...

P1040086.jpg

another job to do re-trimming the headlining.............

P1040087.jpg

engine bay looks sorry for itself.... need to get some polished bits in there!!

P1040088.jpg

got the paint today brombeer!! (blackberry)

looks wicked even on the lid!!


P1040091.jpg

P1040092.jpg

P1040093.jpg

P1040094.jpg

obviously the paint hasnt even been mixed yet but still it looks nice...

Share this comment


Link to comment

they are the porsche 993 seats large bolster /deep bolster tomb stone seats also in the 928 911 turbo so so comfy i sold these to robrado974 and he has changed the colour of them to black and they look awesome!

Share this comment


Link to comment

first the windscreen gets masked around the edges , i have heard so many horror stories with the windscreensi decided to leave it in there is nothing wrong with the one ive got so i dont want to risk it....


trim lift tape is the blue stuff

P1040096.jpg

P1040105.jpg

P1040100.jpg

P1040099.jpg

P1040097.jpg

P1040106.jpg


i have been told they have just finished painting it........

so il get those pics tomorrow......

god this is drawn out!!

Share this comment


Link to comment

ok my first glimpse of it still in the oven...

P1040107.jpg

P1040108.jpg

P1040109.jpg

P1040110.jpg

now what you have got to rember here is that this is gun finnish..... so there are three stages of polishing to be done after this first 2000 then 3000 then finally 4000 then polished it should come up like glass, im really chuffed with the gun finnish and the reflection shots when it is finally complete should be amazing....

P1040111.jpg

the pulled arches have turned out lovley...the original lines are perfect ...I LOVE IT!!!!!!! :lol:

you can really see how much wider they are now properly the oettingers are 8" wide and they are still tucked!!!

P1040112.jpg

front indicators all gone and nowhere to be seen..........again very pleased with the way these have turned out..

P1040113.jpg

P1040114.jpg

P1040115.jpg

the rear swage lines all gone as are the centre vw badge and the corrado badge and vr6 badge super smooth i am now glad i had that done ....at the time i wasnt sure if it would look ok but i am very pleased with it now....

P1040116.jpg

P1040117.jpg

P1040121.jpg

P1040122.jpg

proper pic out of the booth with wheel covers off getting a decent look at the stance of it... really hard to show the colour on this car i want to get it out in the daylight it will look a thousand times better...

P1040123.jpg

P1040124.jpg

P1040125.jpg

P1040126.jpg

sump looks low....

P1040127.jpg

it is low and these are 17's.... hmm i wonder if my 16's will make much difference....

P1040128.jpg

Share this comment


Link to comment

P1040129.jpg

thats all i have got for now folks let me know what you think...

i like it and seeing blackberry paint as it should be just makes me love it all the more... i guess the 15 year old paint looked ok but there is no comparison for fresh paint....

sorry about all the pics but as you know i am extremly excited!!! lol


im bored and these turned up friday... so i thought id have a go at fitting them this morning..

DDI dials wanted these for ages and ages....

P1040181.jpg

first you start off with the instrument cluster out of the car....

P1040182.jpg

then take the outer black shroud off...you can just see at the top of the cluster i have wrapped up some tin foil just to reflect the light a little better from the UV led's, this has worked only a little , the bulbs themselves are very very bright but they are shining in the wrong direction due the holders being fixed that way.... gutted..

P1040183.jpg

this reveals the dials themselves , i have already installed UV led's but im going to have to go the cold tube route as that gives a much better light...

P1040184.jpg

starting with the fuel/temp gauge note the location of the needles then place a fork throught the underside of the needle this is the best way to take them off with the least amount of damage....

P1040185.jpg

then remove the two phillips screws either side and remover the standard dial...

get your DDI dials ready

P1040186.jpg

replace the existing dial with the correct one from DDI and put back in the screws gently and replace needles to correct sitting position...

P1040187.jpg

repeat the process for the two remaining dials...

P1040188.jpg

you have to place the wires throught the gap on the right handside of the dial so they poke out like this..

P1040191.jpg

there is a spare outlet on my kit for the centre console gauges but i will use this to power the UV tube..

P1040192.jpg

positive wire goes to the headlight switch either dimmer or just the normal grey wire...

black goes to ground..

P1040193.jpg

finished and comparison...

P1040194.jpg

Share this comment


Link to comment

front and rear bumpers , doors and tailgate were painted tonight...

i didnt get any shots of the finished articles but i can tell you they look good!!!


here are some just before going in the booth

P1040203.jpg

P1040204.jpg

P1040205.jpg

P1040206.jpg

P1040207.jpg

heres a quick clock comparison...

old ****e green lit ones

P1040209.jpg

my effort with the uv led's...im really am going to have to change that..

P1040210.jpg

here is one with the ddi's lit up..

P1040211.jpg

pics of the other items painted will be uploaded tomorrow sometime just waiting for the wheels mirrors and other bits now..

still should all be done for the weekend!

Share this comment


Link to comment

like a true asshole i left the memory stick in the laptop so i could only get 4 pics on the camera and they are relativley rubbish....


P1040214.jpg

P1040215.jpg

P1040216.jpg

P1040217.jpg


its friday tomorrow and well the wheels etc should also be completed ....get car back saturday!!!

ive still got to finish my garage!!!

paintd the floor and the walls half way down just got to put up the batton all the way around the garage ready for the carpet...

going to build a bench at the rear and get some het in there!!!

P1040164-1.jpg

Share this comment


Link to comment

yea i had a sneaky peak today and all i got was this...

P1040218.jpg

P1040220.jpg

P1040221.jpg

P1040219.jpg

the lovley gun finnish didnt last long.... haha this is when they now wet flat it and then polish it back up ,they have fitted the doors back on and tomorrow the tail gate goes back on and the car should be completly polished , going in at 9am tomorrow so got a good day of it bit of luck end of play tomorrow itl be in the garage!!!!

Share this comment


Link to comment

massive let down today folks... got there at 9am and nobody touched the car as it was busy.... so i started to gingerly attempt to polish the small bits while i was waiting for someone to take over and do the job properly!! hehe

if id known i was going to polish it myself i would have cained it from the start but i didnt go prepared for that...


P1040225.jpg

P1040226.jpg

P1040230.jpg

P1040231.jpg

P1040232.jpg

so thats pretty much it the same on the passenger side i have got to say though i am quite impressed with the finish... one more thing .....

the cars needs to be polished yet!?? hehe the shiney bits i have done is just the first going over with the compound.. the whole car has got to be done with that then you move onto a big soft waffle and use a polish/wax which has a very very fine cut in it this will get rid of all the silly tiny little blemishes and then i have to wax it but im not allowed to do it in the body shop they do not allow any wax in there at all....

so there you go another step closer i cant tell you how frustrating this is....

but i can see it is going to look amazing when all done in the sunlight today the colour looks really deep hard to show it in the pics...

Share this comment


Link to comment

Join the conversation

You are posting as a guest. If you have an account, sign in now to post with your account.
Note: Your post will require moderator approval before it will be visible.

Guest
Add a comment...

×   Pasted as rich text.   Paste as plain text instead

  Only 75 emoji are allowed.

×   Your link has been automatically embedded.   Display as a link instead

×   Your previous content has been restored.   Clear editor

×   You cannot paste images directly. Upload or insert images from URL.

×
×
  • Create New...