Jump to content
Sign in to follow this  
  • entry
    1
  • comments
    93
  • views
    908

That Rado...........

Sign in to follow this  
C488ADO

58,136 views

WELL..im back new motor and new project....

this one is a keeper i have always liked vw's and i really cant be arsed to buy / sell any more cars.... so this one is here to stay, i do have some long term projects in mind for it , it wont be totally mint like concours but it will be tidy daily driver standard, not sure if it will be good enough to show but il like it all the same....


as with any project i undertake time and money hold them up so i will update this as much as i can along the way....


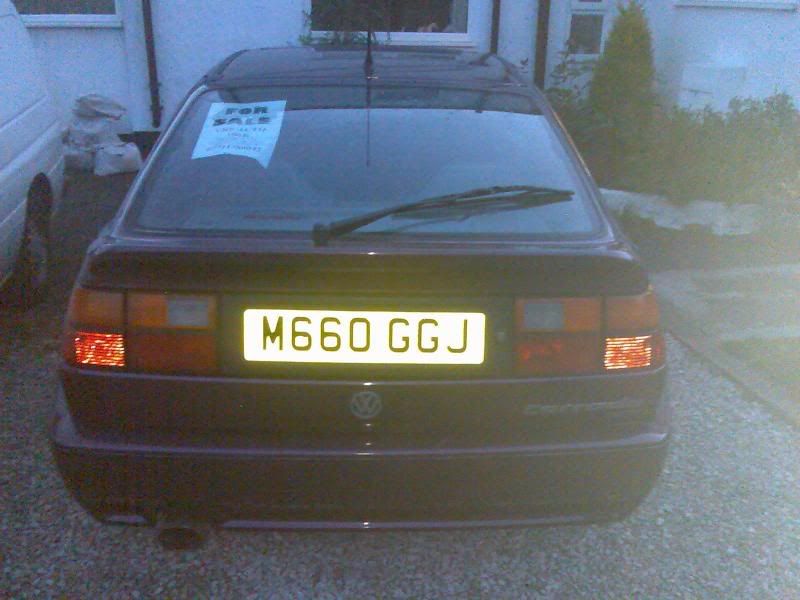
i have gone for a

volkswagen corrado vr6

colour is blackberry

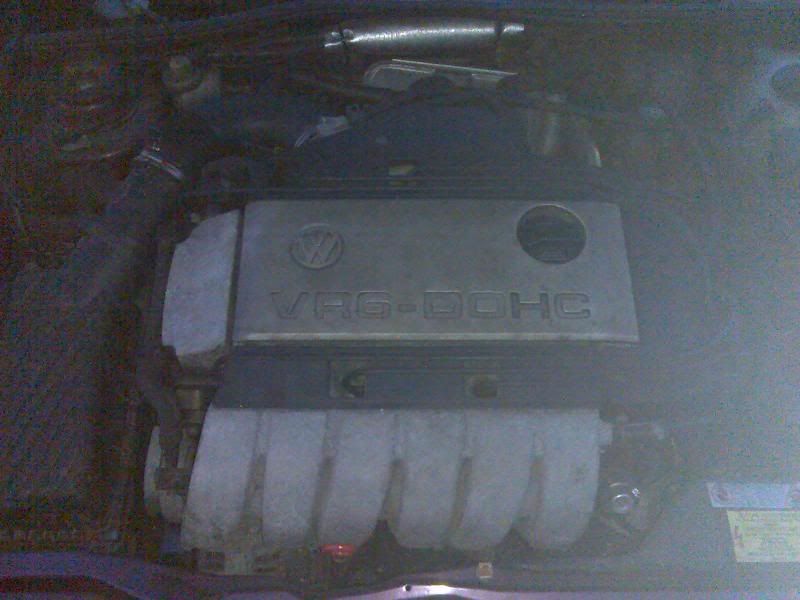
2.9 12v v6

AUTO!!!!!! (ahem this will change in the future..)


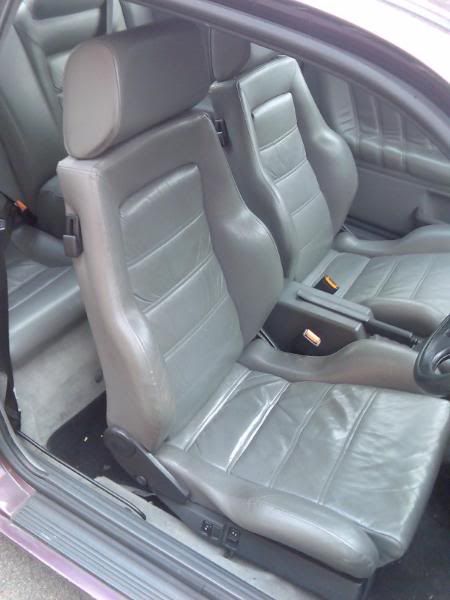
it is quite special really as it has electric heated leather recaro's from new...optional extra im lead to believe at the time i have also heard storys of insurance claims writing the cars off due to them being £4000 each to replace!! lol


it has the same spec as the storm model but it is a nicer colour and has the nicer interior... so in my opinion a better and nicer buy than a storm...


its just coverd 107,000 miles and has full anally retentive service history with a box binder abosolutly bursting with recipts etc etc


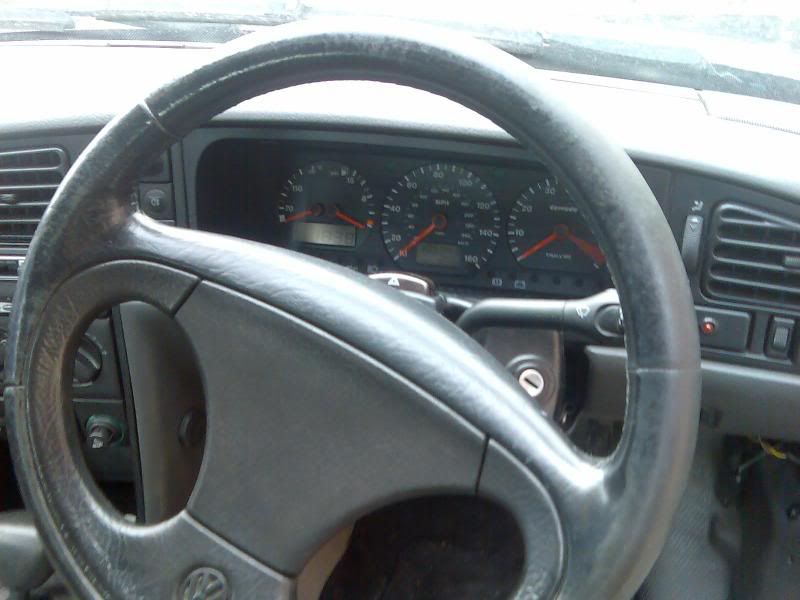
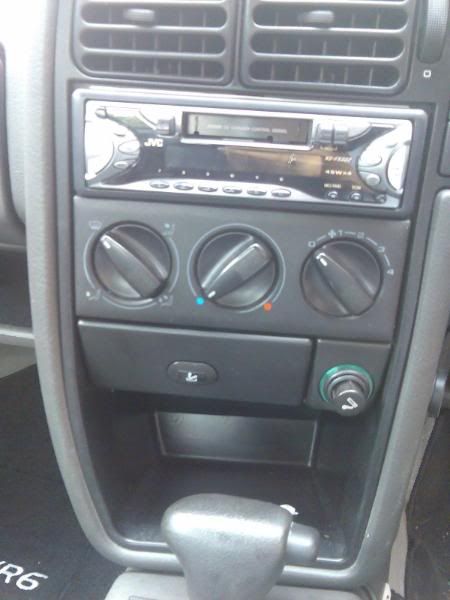
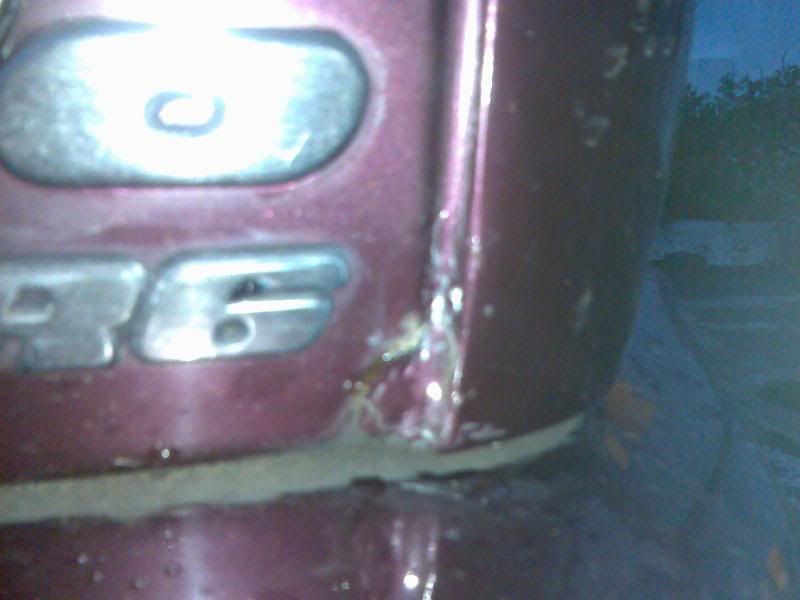
the body is quite tidy for the year and mileage and the interior again is tidy , i would like to spend some time on this later in the project getting it how i like it...


il post some pics up later on so you can see what its like cheers


nate


anyways here are a few pics of the sale adverts...
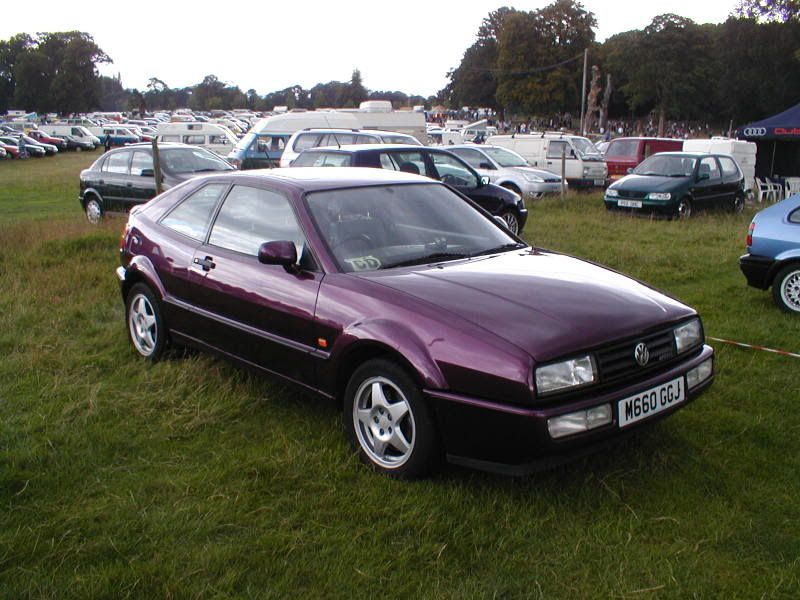
 

Corrado20VR620Auto.jpg


CorradoInterior1.jpg


CorradoInterior2.jpg


CorradoInterior3.jpg


Image015.jpg


Image016.jpg


Image022.jpg


so that was the sale pics not great but you get the idea.....


i guess at this point i could tell you the difference between my car and the storm.


as i believe it the storm was a limited edition run of 500 cars, 250 were blue and 250 were green...

the blue storm had black leather while the green had beige leather


both cars were heated leather seats and that is the main difference... the only other spec difference is the strom badge on the rear of the car and a storm badge on the centre console.....the vr6 badge on the fornt and rear were chrome.


that is the complete difference between the corrados standard models and the storm...so it is possible to get a better specced corrado than a storm!! weird huh?


anyway.....


i like the way the standard car looks it has unusual lines and i think it is quite definitive in its age, there arnt too many around now and you really dont see them very often on the road, it is said that the corrado never really took off and was a vw flop but many many people disagree it handles superbly and the quality of the doors shutting and bonnet the interior really is very good, esp for a car of this age, the dissapointing factor of these cars is the performance... ok they are old they are fairly quick nothing like most cars of todays standards, they have a 2.9 12v v6 engine you would expect more horse power.... these only push out 190 bhp?????


crap really, they should of had a (schrick) vsr inlet manifold from the factory but volkswagen moved to opt out of this due to manufacturing costs so they sold the rights to schrick hence the name... this is basically variable valve timing for the vw!! similar to hondas version... this improves horse power and torque across the rev range and makes a very nice difference


on all models air con and headlight washers were optional....


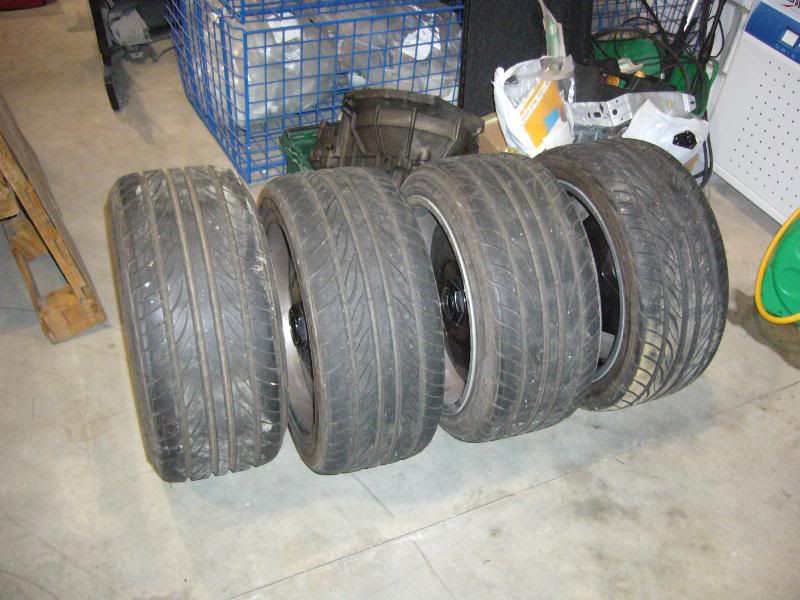
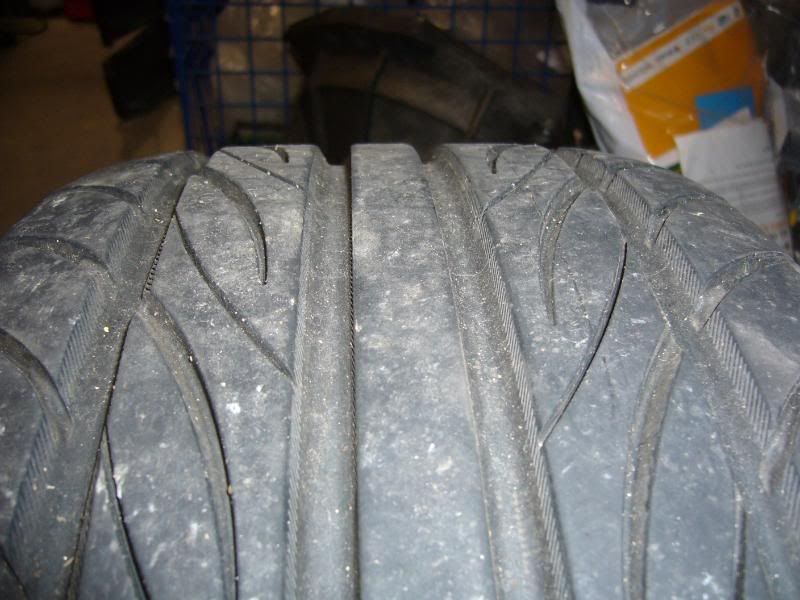
i bought these wheels before i picked the car up and i still think they are old but kinda cool looking.... retro cool....


these are also supposed to be quite rare as they are 5 stud fitment for vw.


Borbet A's


fronts are 16 x 7.5

rears are 16 x 9


P1030270.jpg


P1030269.jpg


P1030268.jpg

Sign in to follow this  


93 Comments


Recommended Comments


well it feels like it has been ages since ive written in this blog....

the rear bumper has had to be painted again as they were not happy with it!

P1040263.jpg

getting prepped and painted again very soon......

the wheels have been done

P1040260.jpg

P1040261.jpg

kinda weid i like them as in the flesh they look awesome but weird.........


lol still dont know if ive made the right decision about colout coding them.... i guess we will see when they are on the car....

the mirrors handles centre caps and rear number plate surround have also been done!!

P1040262.jpg

so we are nearly there..............

i have got to move the shell tomorrow as it needs to be out the way.

hmmmmmmmmmmmmmm anyone got a trailer?????


got so much to do to it now to finish it off just need to get some more funds now!!!!

Share this comment


Link to comment

for some reason when i use the flash the pics come out like this???


tail gate on ..

P1040280.jpg

P1040281.jpg

hmmmmm

P1040282.jpg

P1040284.jpg

getting better but still not convinced...

P1040285.jpg

P1040287.jpg

P1040290.jpg

Share this comment


Link to comment

Sunday was the day of rekkoning!!

moved the car from PPI to its new location this is the first time i saw it fully in the daylight with it having its first polish..it needs to be gone over with a waffle when ive put it all back together apparently..

P1040291.jpg

as you can see got the doors and door handles back on along with the tailgate..

P1040292.jpg

P1040293.jpg

P1040294.jpg

P1040295.jpg

i think the arches are superb they really have done a good job on those hard to tell they have been streched.... still look standard just what i wanted..

i also knew it was going to be low i need to do something about this i think..

P1040296.jpg

P1040297.jpg

the spoiler i had painted is a different colour!!! arrrggghhh cant really see it here and its only noticeable in certain lights... i have a standard one they have painted for me to go on so i might stick with that ..early days yet..

P1040298.jpg

P1040299.jpg

P1040300.jpg

took it out the yard first speedbump....dunk oh **** yep hit the sump luckily no damage this is when we realised i hadnt pumped the tyres up from when they were pianted :roll: :lol: what a dick.....

anyway sorted that out and all was smooth on the way to the garage didnt rub no knocks not crashes bang anything really i was very surprised how nice the ride was considering how low it is....


more to come soon!!

Share this comment


Link to comment

well thanks to ben and stevo over the last couple of evenings wer have managed to make an impact on.....................the garage.... lol

we are getting there..

IMAGE_001.jpg

IMAGE_002.jpg

IMAGE_012.jpg

put a little bench in at the rear, got some cupboards to go in at the bottom and a shelf unit got me pillar drill to go in yet and parts washer but itl get there slowly, theres good light and good space as soon as i sort through all my little bits should be caining this in no time....


picked up these puppies today...

IMAGE_009.jpg

IMAGE_011.jpg

we have a deal on £125 not bad i thought

1 impact and 1 driver

2 l-ion batteries and a 20min charger..

Share this comment


Link to comment

popped over to that garage with ben tonight , had to meet simon there as he refitted the windows for me....

P1040368.jpg

P1040369.jpg

while we were there we managed to fit both front rubber door seals!!! yes both of them!.and thats it!

hehe

i did make a start on tinting my rear lights, what a **** job that is....

got to say i am not a fan of this red tint spray , crap value for money and not really very good to use it is as thin as a thin thing and is very horrible to judge ...i guess if your used to this stuff the story might be different but i think its ****e...

P1040370.jpg

P1040373.jpg

this one has to be re-done as it reacted must of had some grease on there....

P1040372.jpg

this one has had about 6 coats... the thing is they look really red in the photo's but they are not... you get bugger all in the barbie doll sized can and im really ****ed off with it it is so expensive to buy ....

i am gutted

P1040371.jpg

Share this comment


Link to comment

well i had a bit of a result today ..., i rang up demon tweeks and complained about the red tinit spreay ....they have given me another tin!! result!! so when they get some more in its on its way to me, i checked out the lights today they look better but not perfect hopefully they will be salvagable when this tin gets here....


didnt get much done tonight i managed to hoover it out so it is now less ****ty inside and i cleaned the back window!!! not good enough though i used mr muscle and didnt really do what i wanted... autoglym window cream is the best stuff ive ever used on rear windows , it has a very fine cut in it and it ****es through road tar ciggarette tar etc when you use it on the rear windows it brings the heated strip elements up shiney too!!! so you know its getting all the crap off everything...

got the third brake light in tonight and tested it and it works!!!

blanked off the hole where the lock pokes through..

also got the spoiler on and it works plus its in the right position so alls good....

P1040377.jpg

P1040378.jpg

Share this comment


Link to comment

just got back from the garage of love....

picked up the rear wheels today....with the tyres fitted sweeeeeettttt

P1040407.jpg

i have got to re-polish them as i have accidently got tfr on them and it striped the polish!!! arrrggghhhh

nice subtle bit of strech

P1040408.jpg

P1040409.jpg

P1040410.jpg


ah and the front bumper that has been lurkig in the corners for a while now

P1040411.jpg

picked up the bumper irons today

P1040412.jpg

rear wheels fitted not sure about the arch gap though????

P1040413.jpg

P1040414.jpg

P1040415.jpg

P1040416.jpg

still not sure about these wheels you know..

P1040417.jpg

looks FAT and WIDE i love it

P1040418.jpg

i really like the way 9's give the corrado a good wide fat ass they look really sqaut and mean something so aggressive about it

P1040419.jpg

P1040420.jpg

gave the headlining one more go today with the tescos special....

P1040421.jpg


i am impressed with this stuff it smells really nice too!!! top tips!!

P1040422.jpg

P1040423.jpg

front bumper on..

P1040424.jpg

Share this comment


Link to comment

of course my home made highroller dust caps...lockable ones of course

P1040425.jpg

P1040426.jpg

P1040427.jpg

centre caps on and badges looks a bit neater now i think...

P1040428.jpg

P1040429.jpg

P1040430.jpg

P1040431.jpg

front bumper looks good but it also looks low...they have made a striling job of it i must say...

they need to flat and polish the bumper as it hasnt been done yet..

P1040432.jpg

P1040433.jpg

P1040434.jpg

with out the chin spoiler

P1040435.jpg

with the chin spoiler, its only resting in place

P1040436.jpg

P1040437.jpg

P1040438.jpg

P1040439.jpg

anyone fancy trying to photoshop the black inpro lights in the front with a badgelss grille??


not sure which way to go on that front yet...

but its getting there slow progress but didnt do too bad for a quick sess just after work, it started raining so i sacked it for the evening...


thanks for looking

in a bit nate

Share this comment


Link to comment

got on it today and ive got to say its nearly done....... it wont be long at all noe before its on the road....


fitted the front chin spolier today properly and the grille that sits above it with the towing eye covers... yes its needs aclean but the whole car does at the mo...

P1040457.jpg

P1040458.jpg

P1040459.jpg

P1040460.jpg


bumper is now fitted correctly too...

i now need to start the look out for some number plates... i want small french little numbers normally found on the rear of a bike im kinda felling black and silver for shows...or maybe something weird like the blue and white plates you get abroad...

cant get them made yet as im waiting for my number plate.....


got the drivers side plastics all in today that was anass ache of a job dont really want to do it again thats for sure

P1040461.jpg

P1040462.jpg

these trays are a bitch to do

P1040463.jpg

P1040464.jpg

fitted the switch as modded by jmc on the corrado forum..

looks good as standard but now lights up!!

P1040466.jpg

centre consols are in

P1040467.jpg

P1040468.jpg

also fitted the rear lights today

P1040469.jpg

P1040470.jpg

P1040471.jpg

P1040472.jpg

P1040473.jpg


they dont look too bad now really , i will re spray them later on when they fade and il get the stufffrom e-bay next time as the tine is loads bigger

aslo fitted the number plate surround, i have had this flushed so the lock has gone i also broke the tabsoff the bottom but there is a neat fix for this and they should have done it from standard really...

P1040474.jpg

you can just make out in the pic the sides have been sanded down where the other tabs used to be...

P1040477.jpg

P1040478.jpg

Share this comment


Link to comment

im gonna love this car when its done i really am its starting to look good

P1040479.jpg

P1040480.jpg

this is how i left it today

P1040481.jpg

need to sort out my seats next really get the frames and get them knocked up so they work then paint them fit the seats and see what its like.. i need the rear bumper and the bonnet so i can fit them but they should be finished by next weekend...


it needs a bloody good valet but i cant do it until the car is finished..

i guess i had better start on the p.c again soon....


picked up some subframe courtessy of steveg on here stripped them back and had to weld them up with different plates to get them to fit my seat bases....

P1040501.jpg

P1040502.jpg

P1040503.jpg

P1040504.jpg

good old pauly welding for me....lovin the bald spot!!

P1040505.jpg

P1040506.jpg

picked up some stainless bolts to bolt it all together with..

P1040507.jpg

ok not great pics and no the seats dont match but yes i am getting them reconnolised!

:lol:

they should look pretty good when all painted up they fit very snugly and the driving position is perfect they hold you just right

P1040510.jpg

P1040516.jpg

P1040517.jpg

the seats will match the rears when eventually done , i just want to get in it and see all about the driving of it right now ground clearance etc etc

while i was at it i thought id try and see what the centre console looks like in position...


P1040512.jpg

P1040513.jpg

P1040514.jpg

P1040515.jpg

i have got to ditch that crappy old steering wheel and get a momo race in there or something....

looks so old and ****e -ruins the interior imo

so not long to go peeps before itl be driving about, cant waitito clean it!!!

Share this comment


Link to comment

lol yea cheers for the rescue bud!!

straight on it, fitted bumper no probs... got the rear lights in and finally fitted the bonnet!! gave the whole car a rinse off with the power washer today just to get the excess polish out of the corners etc


P1040536.jpg

P1040537.jpg

wheel arch rear bumper combo looks quite good!!

P1040538.jpg

finally getting the look i wanted

P1040539.jpg

P1040540.jpg

P1040541.jpg

P1040542.jpg

P1040543.jpg

that number plate has got to go

P1040544.jpg

P1040545.jpg

P1040556.jpg

P1040546.jpg

P1040547.jpg

P1040548.jpg

P1040550.jpg

P1040553.jpg

P1040551.jpg

P1040552.jpg

P1040555.jpg

Share this comment


Link to comment

thanks for the comms guys...

ive spent what seems an age just tidying up the loose ends and there are more and more things to do!!

P1040608-1.jpg

driverside rubbers all treated today and the rear leather door card and seat also managed to clean most if not all of the crap off the headlining , just got the sunroof bit to sort out there just isnt enough time in the day at the moment!!

Share this comment


Link to comment

started speading the love on the rado on monday and again today giving it the polish it deserves the paint was still flat from when they flatted it back with 2000 or whatever and man it needed it i think il go over some areas with 4000 grit just to be picky but over all it is coming along better than expected

seats are due out this week as they are booked in for next week to get sorted while that being done im gonna wash the carpets again just to get them mint

i have started to do some more work on the boot build had to reshape and trim the wood to get it to fit how i want i think i will do the same to the sub box il get some pics up when i take them but it should all look nice when finished....


audioscape have got the door pods on special at the mo for £120 so il grabthem while theyre hot

wanted list

standard front fogs and indicators

swg scuttle panel

standard front grille

american/german spec front bumper

or front bumper side repeaters so i can graft them in.....

Share this comment


Link to comment

managed to retrive a couple of things i did next!!

good job its still all in order...

crack pipe turned up today, and so did the sump i got from someone on the corrado forum.... :evil: :evil:

damn thing was split around the sump drain and from the drain going forward....hmmmmmmmm so i took it to a friend of mine and he gave it a tweak....very pleased with the results...

P1040624.jpg

P1040625.jpg

P1040626.jpg

P1040627.jpg

P1040628.jpg

P1040629.jpg

P1040630.jpg

P1040631.jpg

he's put a kick up on the front of the sump to helphe bottom of the sump has been plated with 5mm steel plating so it should hold up quite nicely with the bumps...t

Share this comment


Link to comment

thought it high time i updated this thread!! as you can see not much has happened but i have been fannying around with a few little bits and pieces... yea its all work in progress but itl come together soonish?? lol

i decided to rip out the centre console again and finally get it sorted, the cracks the colour the texture etc

P1040658.jpg

P1040659.jpg

this is the back of the console

P1040645.jpg

the front was quite badly cracked as i hadnt fully reinforced the surround when i grafted it in the first time round

P1040646.jpg

P1040647.jpg

P1040648.jpg

Share this comment


Link to comment

so i set to work making sure it isnt going to move about anymore...good old mitre bond!! did the trick just fine

P1040649.jpg

P1040650.jpg

P1040651.jpg

on the front i filled all the holes and then sanded the front back until i could see the old heater controls again....

P1040675.jpg

P1040677.jpg

P1040676.jpg

after a quick very light dusting of texture and some black colour with a little bit of clear texture to even it all out this is the result i ended up with...

P1040679.jpg

P1040680.jpg

P1040681.jpg

this all needed to dry up solidly for now so i turned my attention to the instrument cluster

P1040657.jpg

next up a quick trip to maplins and picked up a cold cathode tube and a blue tube with transformer...

P1040653.jpg

P1040652.jpg

Share this comment


Link to comment

i cracked open the tubes..

P1040654.jpg

P1040655.jpg

leaves them looking like this...

P1040656.jpg

lol thats as far as i got with that today as i was real short of tools... il finish that tomorrow...

i have fitted some of the door pins we have been making and i think they look quite trick nice and subtle

P1040669.jpg

also fitted were the dice aerial topper

P1040670.jpg

P1040671.jpg

and of course dont forget the dice dipstick!! lol

P1040672.jpg

P1040673.jpg

the last thing to update on is the shift light kit ....this came in the post today thanks to mr beige on the corrado forum!! going to fit this tomorrow... of course il update on it!

P1040674.jpg

Share this comment


Link to comment

fixed the screen myself and got it in the car!!

so here are a few screen shots so you get the idea of what it can do?? some of the features dont work as i havent got the hardware for them yet....

start up screen..

P1040716.jpg

main menu

P1040724.jpg

GPS

P1040725.jpg

Share this comment


Link to comment

media

P1040727.jpg

P1040728.jpg

P1040729.jpg

P1040730.jpg

P1040731.jpg

P1040732.jpg

P1040733.jpg

P1040734.jpg

P1040720.jpg


well thats about it really i need to load all of the rest of the gear to get the other screens working...

Share this comment


Link to comment

so i havent updated for a while!!

i havent had time to do anything to the car plus i just havent had the interest i should have...

not sure if ive posted these but this is the last pics i took before going back in the garage for storage and more work....

P1040741-1.jpg

P1040742-1.jpg

i bought a new storm wiper cover ,aero blade and storm wash wipe kit on monday it turned up next day so i need to get this fitted it is gonna look so good once fitted they are awesome and well priced too!!

P1040816.jpg

P1040817.jpg

P1040821.jpg

i thought it about time i had another go at doing the heater illumination (i really needed to get this nailed) after i had finished refitting the centre console last timei forgot to do the illumination!! so i ripped it out and never got round to it , but not anymore i started on this on tuesday night and had another go tonight its almost there...


i had to get the control backing panel and remove all of the webbing i could, to get a nice flat plain surfacce so i could mounty the led's

031.jpg

032.jpg

Share this comment


Link to comment

cheers bud no where near finished yet ....unforunatly.......

heres a clearer shot of the webbing i had to get rid of,

033.jpg

034.jpg

035.jpg

tin all the wires then attach to the led strips

042.jpg


044.jpg

045.jpg

real pain in the ass they dont come any smaller than this!!!

046.jpg

just a quick trial run

049.jpg

P1040823.jpg

numbers 234 are a pain to light up as there is hardly any room due to the way that side is built in side...

P1040833.jpg

P1040834.jpg

its not too bad though i might have to stick a single led if i can cut one short enough and it still works!!

P1040838.jpg

i am also thinking that i should have used white led's??? maybe i dunno yet would match the ddi dials i guess but all the dash switches are red hmmmmmmm


any thoughts anyone??

Share this comment


Link to comment

the cubby hole only has 3 led's in it!! im not sure about it all yet..

ive also started work on the boot install i started but never finished..

im going to just whack it in and later when im happy with the tunes set up and speakers i will re cut/trim it so it looks awesome.

couple of pics as it is now..

006.jpg

007.jpg

008.jpg

009.jpg

010.jpg

011.jpg


after seeing my cuz's rallye again it made me think id better polish my car (his anal retentivness is very catching)

i invited him over hopeing he would be suckerd into polishing it , but the little **** had other plans so i bummed out and had to do it myself (just as well as id do it properly)


it now has a shine

012.jpg

013.jpg

reflections arnt bad

014.jpg

after a few trips to the garage id noticed that something had and kept ****ting on my car , it turns out these little ****ers are to blame

017.jpg

019.jpg

total pain in the arse but i wont touch them as it is kinda nice they wanted to bring thier children up in the presence of greatness....

a lame attempt of trying to recreat the sun to show swirls... didnt work (or i dont have any?!)


024.jpg

been working on this site and had some stickers made ~(i like them )

029.jpg

blatent plug


also working on these to add to the folio

now im just whoring myself out

P1040804.jpg

P1040805.jpg

P1040812.jpg


anyway back to the console this is how i left it as i got cold tierd and my back was aching


P1040834.jpg


in light

P1040836.jpg

im going to have to add the other led's some how...

P1040838.jpg

Share this comment


Link to comment

finally at long last i have got the fan lights on the console working!!!! yahoo!!!

what a god damn mission that was just an all round ****ty crappy job i kept on putting off but now has finally been sorted, not been doing much really just tidying up odds and sods silly things like fitting the centre console back in making sure the dash surround is fixed in position etc etc got the screen in properly now got the wifi hooked up but not working!!!!!!!! another headache got vag com installed but not working!!!!! got bluetooth in but not working and got a wifi mouse installed and it works!!!!

been messing around with robs angel eyes in out in out etc etc fitted cross hairs to my standard headlights tonight, doesnt look to bad couldnt get a decent pic so thisl have to do!!!!!!

IMG_0070.jpg

IMG_0117.jpg

Share this comment


Link to comment

got the fogs and indicators in now looks so much better

P1040954.jpg

got the small plate on but the big one on tap just in case...

seat dye is next on the cards made some enquirys today just waiting to hear back from an old friend on the saab forum (he deals with this stuff everyday)

DSC00493.jpg

wheels have been removed and im borrowing some 16" from john just to keep the car rolling the borbets have gone in for a complete polish will be interesting to see what they look like when i get them back so gone are the colour coded rims and bling bling is the new way ahead thought id brighten it up a bit...


engine bay clean up is starting soon maybe before christmas depending on 2nd car situation.....


so thats all the updates for now

still need a p.c guru to come sort out my wifi connection and my vag com port settings!!!!!

Share this comment


Link to comment

gave it a clean....

washed it as always the 2 bucket method didnt have chance to polish it today though too damn cold.....

whe we get a space heater or something that keeps us warm il have a go then it doesnt look too bad at the moment but you can tell when washing it the wax is wearing off not bad at all though been on there since the end of the summer!!!

P1050003.jpg

P1050006.jpg

DSC00581.jpg

DSC00582.jpg

DSC00583.jpg

DSC00584.jpg

Share this comment


Link to comment

Join the conversation

You are posting as a guest. If you have an account, sign in now to post with your account.
Note: Your post will require moderator approval before it will be visible.

Guest
Add a comment...

×   Pasted as rich text.   Paste as plain text instead

  Only 75 emoji are allowed.

×   Your link has been automatically embedded.   Display as a link instead

×   Your previous content has been restored.   Clear editor

×   You cannot paste images directly. Upload or insert images from URL.

×
×
  • Create New...