

Bruno
-
Content Count
235 -
Joined
-
Last visited
-
Days Won
4
Posts posted by Bruno
-
-
It should fit nicely. I see it even has the hangers for the later version of aircon condenser, so yours was meant for a post 1993 VR6. The bottom pins did not change for VR6 Corrados even through the face lift. The top turret didnt change - only the aircon pipe hangers and condenser hangers.
Please post here when you've fitted it I need know how you get on with that one. Have a contact in the US who is worried about the pattern radiators available for his SLC over there and is scared of buying one from the UK without knowing that it will actually fit properly. Looks like the Valeo VR6 copper ones are still around but terribly expensive.
-
About 8 years ago whilst doing a review of VAG I happened to stumble on the fact that the Corrado OEM rads came with Valeo, Hella and Nissens - the European market. My original rad kept developing problems with the side caps, so I bought a PWR radiator about 10 years ago. Small problem with the top right fitment, it fouled a lip next to the battery housing, but 5 mins with a dremel was enough.
Bought a Valeo copper radiator for my wife's Corrado. She used to do a lot of long high speed journeys from London to Newcastle three times a week, and that radiator ran the engine a lot cooler, on extended idle oil temps were a lot lower. Although it was almost £300 at the time, it was really worth the money. The welds were excellent.
Do let us know how you get on with that Dasis.
-
Just the servo. I've been thinking about Kevin's suspicion that the fulcrum point on our brake pedals is wrong - and it leads to a long foot movement before anything happens. I have an idea for a simple modification - but to understand whether the idea is valid I need to cut through into an existing servo and measure up the actuator gaps.
Its just a hunch - and if it works we can all benefit.
Dont need the ABS unit. I'm in the process of planning a swap from TEVES04 to TEVES 20 - but also want to fix the problem with the length we have to push our pedals before anything responds. It could be something really quite simple - the second actuator is not designed to move for the first 0.8 cm in the servo - which results in 3 inches of movement on the pedal before anything happens. On my daughter's Saab 9-5 the internal play between the two actuators is 1mm - which leads to a 0.7" slack on the bottom of the brake pedal. If I'm right, a longer clevis pin fitted to adjustable thread on the first actuator rod and well measured stop and clear points will do it.
But I need to check this before causing lots of people to crash their cars.
-
Do not need a working version - in fact if its broken thats would be fine for me because I need to open it up anyway.
It must be from a UK Corrado which had ABS TEVES02 (pre-facelift) or TEVES04 (post facelift, post distributor on the VR6) at the time it was removed. I need to break it down anyway, study the membrane mechanics and understand how the incoming pushrod (that links via a clevis pin to the brake pedal) is assisted. What I'm looking for isn't in the google pictures.
Will pay for the postage, or collect if you live anywhere close to Orpington.
So if someone has one spare, lying about, rusting and would be open to packing and posting it - I have a good use for it.
Thank you.
-
My search for B4 with a decent intact servo is proving to be fruitless. Found a few - but as tonedef found they all seem to be badly rusted.
However the good news is that the search has become a little more strange and interesting:
- The TEVES20 configuration was also available on the SEAT Toledo RHD in the 1997-1998 window, with the right bracket, loom, servo. There was one in the west country but I missed it due to the lockdown and its since gone to the crusher. 🙄
- I've been searching for cars which used 358 612 107 B. Sitting down? According to ETKA 7 this same part no - 358 612107B was the same as 358512107, or the ATE 300079, more commonly called the ATE 03.7750-4902.4. - a 9" servo, without that brake position sensor. I can't be the first person to stumble across this, but it seems that this part was also used on RHD 'Corrados that didn't have ABS installed. It kinda makes logical sense but could someone else confirm this please? If this is right, the older OEM 9" non ABS servo in Corrado's servo works with TEVES20. Is this nuts or does this make sense to anybody else?
- Am finding myself looking more closely at Mk4 servos. Now I know that easypops said that it isn't a good idea to use a Golf Mk3/4 servo - because of the ball pin fitting, which doesnt work with the clevis pin fitting on the manual pedals. So ....here's the question - has anybody used that on the original mechanical pedal system, cut the ball, threaded it, screwed on the clevis pin from the old servo and got it to work properly?
-
@easypops @tonedef. Thanks guys. I'm compiling all the data as I go along. My aim is to add to this thread with the part numbers and additional forum links.
-
Hi. I first had a dealer installed Diavia system added in 1997. It cost £1314.65 all in. The parts included the following items:
- Diavia custom heater exchange unit, blower; Diavia condensor and dryer,
- Diavia specific loom, plug and play;
- VW Bosch clutch and a/c pump
- dealer made pipes and a messy switch system based upon the Golf, but not really appropriate.
- the passenger side modifications were ugly and messy.
It worked well until the brushes went on the blower - there was no replacement Diavia blower out there. Had to replace with a modified T3 blower.
The pipes you present are specific to the LHD cars. There wasnt a mirror image of those pipes ever made for RHD cars - except in part with the Mk3 and the Passat. One of your pipes can be re-used, perhaps two. The rest could serve to help shape mirror image versions.
The bits relevant to the RHD cars (in your kit) are the compressor, the condensor, the dryer, the most importantly the side frames for the condensor - which are very difficult to find now.
In order to complete it one would have to source (i) the loom components - very rare now but can be partially obtained from Mk3 Golfs with A/C (ii) the a/c heater exchange unit, and blower sectons for a Passat (some have used bits from Passats, some from Leons) (iii) the AC control panel (upgraded from the normal three way switch). - thats still available from dealers.
If I had the time to redo my existing a/c I'd replace it all with the parts from a Mk4 Golf or Leon, and spend ages rebuilding the loom to make it work sensibly. It can be done - and it is absolutely worth it.
-
Hello I wonder if those who've implemented the TEVES 20 change would chip in. I've been searching carefully for the parts and noticed something strange. It seems that the B4 Servo for TEVES 20 is no different to the B3 9" servo, or indeed the Corrado VR6 9" servo. One part no: 358614105. Am I mistaken?
If this is correct then it seems i can keep my existing VR6 servo. Is there any need to remove the servo during the upgrade - or does the loom thats pinched into place behind it need to be accessed?
-
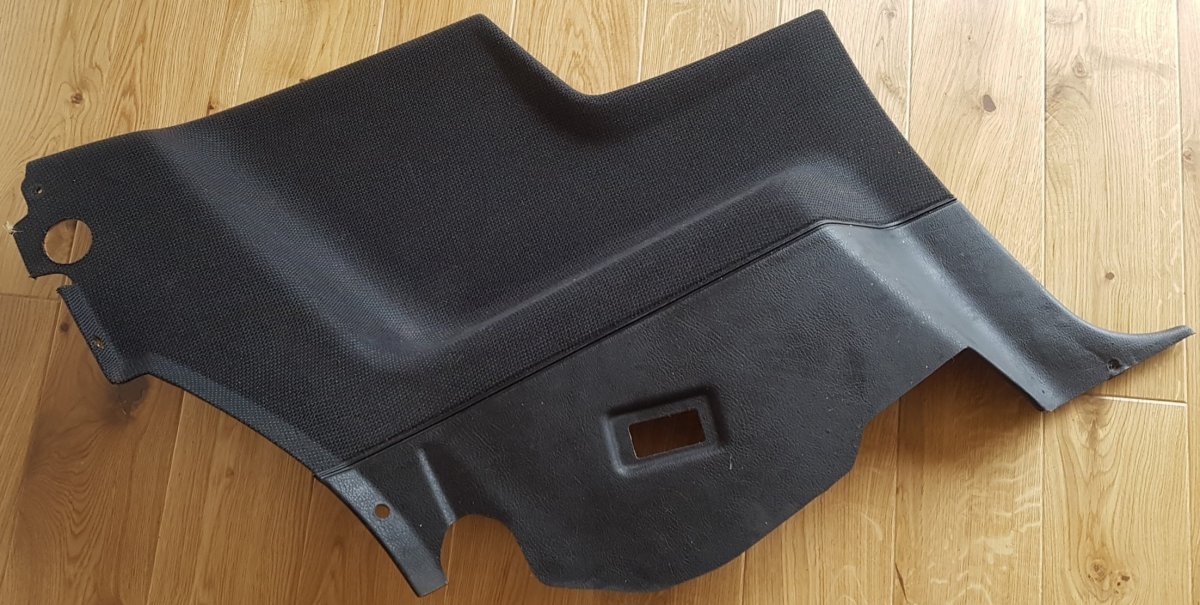
Only the Tailgate left now. Anybody need one? This one has no rust at all.
-
Sold to Bails88. Thank you.
-
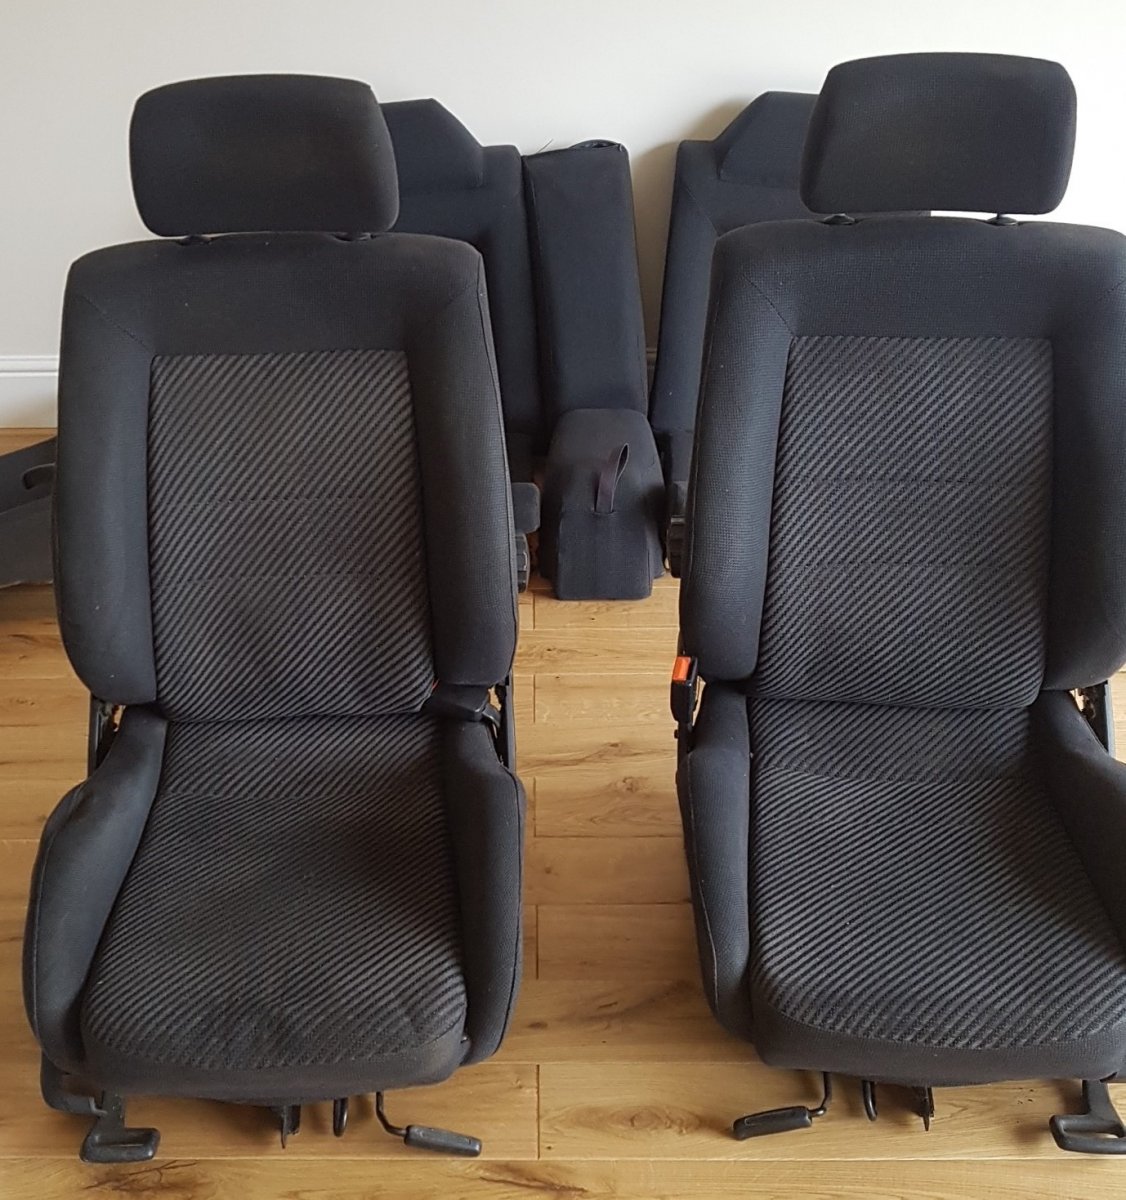
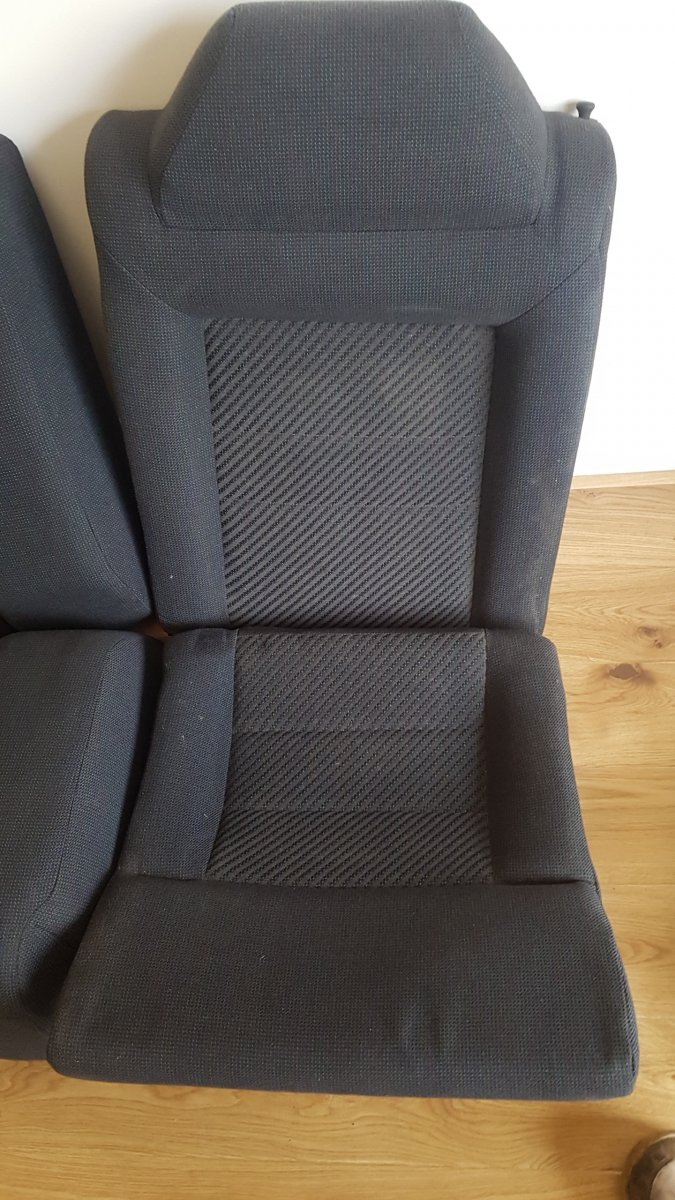
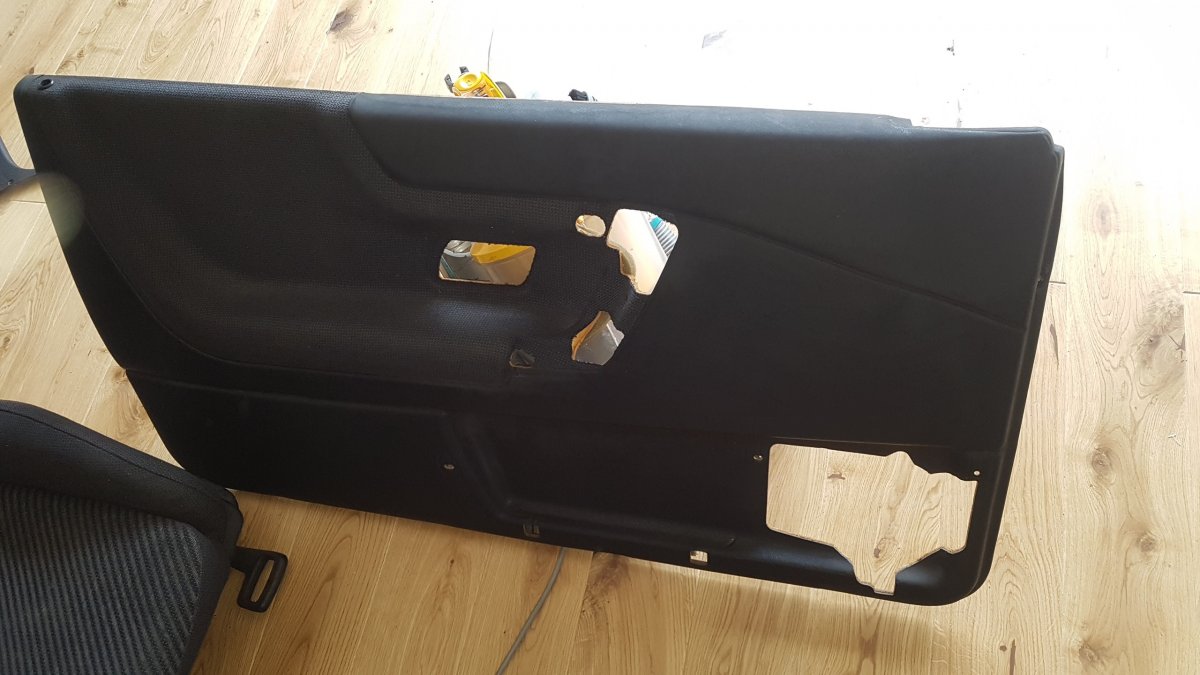
From a 1994 Nov Corrado VR6, with 60,000 miles on the clock. Left over from a project to upgrade to leather. This lot has been in storage since the car was 3 years old. Clean, almost no blemishes, very little bleaching. Only been used for 3 years, then stored in a warm, dry, environment, wrapped. Door cards included.
Note.
1. There is a 6mm hole in driver's squab, almost unnoticeable, seems to have been mechanically punched into place. See photo. Can be stitched shut or a black plastic cap inserted.
2. The compression lines on driver's squab can be brought out with a steam cleaner. They were caused by the other seat leaning on it whilst in storage. Kept safe and dry all this time.
3. The driver's door panel at the very top, window edge, has some vinyl shrinkage. Not noticeable when fitted (the window rubber covers it).
4. Door Speaker pods and trays also available for purchase separately £5 for the pair.
Offer of £170 or more, collected, cash or Paypal - sold as is. Will respond to a courier. Happy to suggest a few. Already have four people thinking about this. Have bubble wrap. Can buy straps and a pallet if this needs to be collected by a courier and I'm needed to pack and wrap it. I recently did a similar exercise for easypops and the pallet+straps came to about £40.
Said with respect: please only contact me in you are interested in buying this. Am not in the trade. This is from my car. Replaced it with an OEM leather suite. So this is waiting for a good home.


-
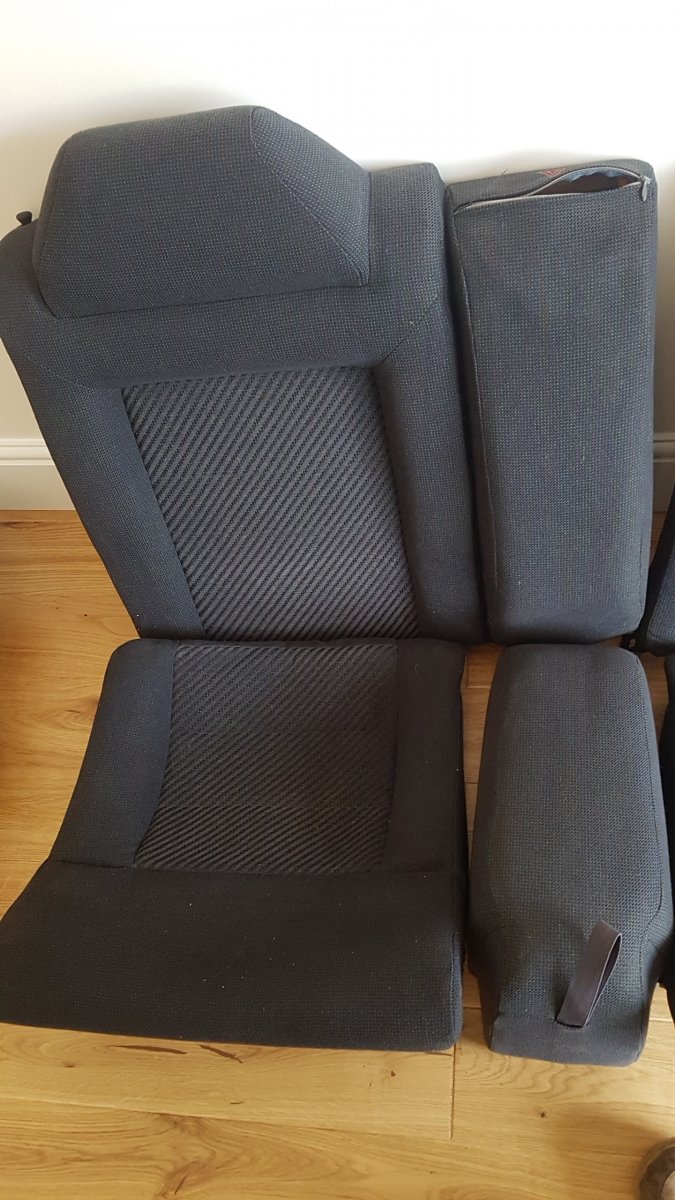
Rear bench has gone.
-
Hi everybody.
Easypops hasbought the original beige interior. The original listing has been updated as I've dug out more stuff which needs to go. Have a look again please.
-
Items left
1. Beige door genuine leather panels for 1995 Corrado VR6. The passenger side tray has a small 1.2 cm x 0.4cm piece of plastic missing. If your tray is intact it should fit. See photo. Otherwise clean set - from the very last series of Storms, ones with the leds in the door pin carriers. £180*.2. Beige Roof lining.. £20*.3. A purple-grey 1995 tailgate, complete with aerofoil, plastics, and motor intact. No marks, no rust. £50.00*
4. 288mm front calipers, painted in red 2k paint, boxed, only used for 3 weeks. £50 plus p/p.
NB: * refers to items which are priced at cash on collection. All located at Whitstable, Kent. Some items can be taken to Orpington, Kent if it is helps. Couriers are supported. Am willing to put the parts onto a pallet, if buyers allow for the cost of sealing and straps for the pallet. The calipers can be posted.
I need the space back quickly. Selling home and moving. So it all has to go.
-
As long as everything is working fine, its ok for now. If you do have problems, or are worried, then you will need access to the plug map, and wiring diagram. If you want those, please PM me. I'll email you copies of the diagrams.
-
Hi. PM me. I have a VR6 bodyshell laid up in Whitstable with a rear beam still in place. any good to you?
-
Hey chaps,I was wondering if anyone could be so kind ,who has a copy of ETKA, to have a look at headlamps for me i need to find out if its just the head lamp glass that is different between LHD and RHD (EARLY TYPE). Could some have a quick look for me as ive already looked on the ETKA link here and i cant speak Russian or perhaps im just dim!
Many thanks
I looked up 1989. Thats the beginning. There are only two headlamp housings, one left, one right.
Left is 535 941 131
Right is 535 941 132
The reflectors in LHD and RHD were slightly different, but the difference was negligible in the early model. In the later model they were very different because of the distance of the front lens from the reflector's centre of focus.
-
Hi. Well its about to happen. I've had enough of stalling at lights and poor diagnostics. The change to OBD2 on my VR. I've read most of the threads that refer to this, and also Dennis' thread on Corrado Ca. It seems that apart from starting with the right bits, there are few hiccups along the way:
1. Removing and replacing the Servo.
2. Recalibrating the Throttle Boddy.
3. Proximity to the ignition pick up coil with the appropriate key.
Bentleys sheds little light on the issues with (1), and wouldnt cover (2), and (3) seems relatively easy to address. Coming up with a good, well spliced and wrapped loom is not an issue for me. So....
------are are there issues which I need to watch out for?
Any advice on how to handle (1) and (2) and the rest you can think of?
-
hi!is there any chance to replace my heater matrix without taking the dash off?i really don't wanna touch the electrical wires.thanksI know two people who claim it can be done. I dont believe them. There's too much you need to check at the same time that also goes wrong. Its not just the exchange unit, its the bowden cables, etc - all of these are worth sorting if you take the time and want not to bother with nonsense in months to come. Remember - its an old car.
-
Great post Bruno! :salute:Nothing happens for me when I turn the heater on, I think either the blower motor is gone or there's a switch/electrical problem. That's great food for thought :)
Sort that out in reverse order of common logic, ie:
1. Pull the blower out and check it. If it runs, then the chances are that the fuse has gone.
2. If thats OK then the painful part starts. Pull out the controls and switch and find out where the power failed.
3. The fact that you said it doesnt work - I assumed it didnt on all four speeds. If it works on speed 4, then the thermistor on your speed control resistor pack has gone. Its a common fault. Go to maplins and get the thermistor, then have fun replacing it. Or you can buy another one from the stealers
-
Do the filter. Go fill up with fresh fuel. Put in the cleaner. Do both at the same time with a really hot engine, ie the cat at full temp. Dont load fuel system cleaner onto a cold cat. There's no need to consider getting a new lambda probe unless your fuel consumption has been wildly out or the performance has been naff.
-
Well after a very early start this morning and 4 litres of brake fluid i have what can only be described as brakes! Only took 4 days and a lot of swearing. Finally got it running and on its wheels again to find that the abs actually works now i have fixed all the sensors. Think i even have traction control as when i went to light the front wheels up today it was hopping all over the place. And as an even better friday present it passed the retest so i have another years ticket :clap: :clap:Although now i have plugged the abs light back in it does not want to work. As my abs has been faulty since i owned it i thought it was supposed to come on with the ignition but now nothing. it used to be on all the time. Strange as the abs actually works now?? If the light is faulty would it cause an abs shut down or does it not check the light? have tried another bulb across the contacts and that does not work. is there anything on the abs circuit to actually break just looks like a bulb to me?
Anyway i am going to have a few well deserved ales this evening and ponder some corrado spend now shes back on the tarmac. :D
The light on the US/LHD version plays a different role to the one on the RHD version. In our version it has no part in the trigger of the ABS relay, just offering a status of whether the ABS brain has taken control of the pump. So:
- before you start the engine to listen for the sound of relays behind glove box kicking in.
- if you dont hear the sound, then it may be that the ABS brain hasnt engaged;
- if you hear it wait and then kick in, then the ABS brain has engaged; if it then clicks again, it means that the pump has not completed its comms with the brain, and the brain has turned off to prevent damage to the valves.
Putting a new bulb is relatively easy, pull the lamp holder, carefully take it apart, and check the bulb for continuity. Once you are sure it has failed, one can obtain the bulb from an RS (Radiospares) spares dealer or, failing that, an LED with a resistor should be used to replace it. Not a big deal, but it does take time to get the bulb. If I remember correctly its unusual, something like 3.2v....
Try and borrow a vagcom and put it on the diagnostic port and see if you get any abs fault readouts. clear them, and check again. If a fault appears, you need to follow tha. Hey- you really should be proud of yourself, you are unlikely to get this again for a long time.
One small thing. Get a bottle of copydex solution and paint the joints upon the pipes you had recently replaced - both the metal pipe ends and caliper ends. It produces a milky waterproof, rubberised surface that dries to an almost transparent state. It prevents further corrosion. You can use to cover any surface which is exposed to water but you need to protect. When you need to open the nuts one can grab the rubber coating and just tear it off.
-
if of course you don't want to go through that mammoth task of jacking up the rear beam with extra stands etc etc you could just undo the 13mm bolt that holds the bias valve onto the rear beam, then hang a set of mole grips etc off the pivot from the bias valve to ensure it stays fully open when you bleed the system!edit - just read theabove post fully (no offence meant here btw bruno) - there's absolutely no need whatsoever t go through all that elaborte process - all having the engine runnning does for the brakes is activate the vacuum going to the servo and give you servo assistance - the actual hydraulic braking system is completely independent of the engine!
Fair point Pete. My post was really quite silly. Although I wasnt confused about the servo and ABS systems, I made an even more silly mistake.
- I didnt make it plain that the point of running the engine was to warm the back hubs to enable the balance to settle, the new pads to takeup the undulations of the disc...but that would mean driving it for 10 mins... Old rear hubs can be a problem. The way I wrote it- it would give the impression :cuckoo:
that by running the engine in gear - somehow the back wheels would be turning
Sorry about that folks. Please put it down to being tired and getting old and stupid.
-
Hi Guys,As some of you may have seen, some idiot broke into my car a month back and did an absolute number on my drivers do. So much so that it ruined the latch and the door was locking with key only.
This was fine until I got the respray done when the guy repaired the handle and mentioned that the key worked but not the central locking so I take my car to ASDA, lock the drivers door with the key, lock the car and now the drivers door can not be opened. I have just spent £250 on a new respray and £700 on a new cream interior so I would be really grateful if anyone knows a way of getting the door open without damaging either!!
Also if anyone has a drivers side latch mechanism, I would be very interested!
Cheers!!
John
You do know that the passenger door also opens with the key?


Word of warning on Aftermarket alloy Radiators
in Engine Bay
Posted
EAN is 3276427346060. The Valeo part No is VALEO 734606. Cannot seem to find anybody with this in stock in the UK. Some Polish sources, but I don't read Polish.
The original copper version had this VAG part: 535121253, made in France, by Valeo. However I do not think VAG fitted them to Corrados as production radiators. The ones made in Germany were aluminium and had an E on the end; the final version had an M on the end, it was aluminium, made in Denmark, by Nissens. The E and M versions were fitted as production rads.