
k6kny
-
Content Count
110 -
Joined
-
Last visited
-
Days Won
1
Everything posted by k6kny
-
Finally got round to putting my private plate onto it!!
-
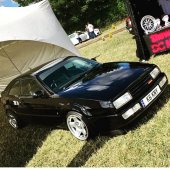
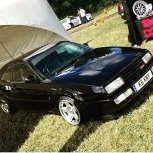
Finally got round to changing my private plate over to the Corrado As it was a rare sunny day today I took the Corrado for a run when I went to the gym, and snapped a couple of pics in the sun while I was there
-
Great work, the rado's looking fantastic and love the re-trimmed wheel!!
-
I'll take these if they're still available. Would need them posted to Glasgow.
-
Corrado display @ 2016 VW festival
k6kny replied to VAG-hag's topic in Event Announcements & Discussion
That's me registered -
So after fitting the Recaros I still had to wire them in to get the electric height and back rest adjustment working. It turned out to be a much simpler job than expected and is easily a job that can be tackled by someone with little or no experience. First you need to remove all the lower dash trim below the steering wheel so you expose the fusebox. The fusebox needs to be lifted out to get access to the back. To do this there is a white clip that needs to be released on either side of the fusebox. First release the one on the left hand side. Pull it away from the fusebox and then towards you. The clip will now lift straight out. Now release the clip on the right hand side. This one is harder to access and you may need to use a screwdriver to help lever it down. Pull it downwards and then turn towards you and pull free from the fusebox. Next lift the fusebox out of the bracket it sits in. Lift it upwards and towards you. This bit is a bit tricky and will be quite tight to get out, don't worry be patient and take your time. Once it is free of the bracket tilt the top of the fusebox towards you so that you can access the rear of the fusebox. I was fortunate enough to have got the original loom along with my seats so the next stage was to take the power supply from the battery busbar to the fuse. The battery busbar is located at the top right hand side of the rear of the fuse box. You will see two thick red wires in pins 2 and 3 and pin 1 will be empty. This is the pin I used for your power supply. In the pictures you will see I have already connected the yellow positive wire in pin 1. After connecting the positive supply I then connected the looms fuseholder in one of the spare slots on the top of the fusebox. Next I had to earth the negative (brown wire on the loom). Although you can earth anywhere on the bodywork the best place is to look above the fusebox at the bottom of the A pillar where you will see a circular earthing plate with several spare terminals. This is where I used. Next I refitted the fusebox. I then tested the seats and made sure they were fully operational. Next step is to remove the seats and carpets and fit the wiring loom properly. Update soon.........
-
I'll be up for coming along to your spring meet. I'll check out your retro VW page too!!
-
I'm currently running half leather electric Corrado Recaro's and a stock VR6 steering wheel.
-
Really like the black badges, look great against the grey!
-
Yes it did, phew!!
-
I decided to go with a black/orange theme on the car so I painted the calipers orange and also changed the rear lights back to the original orange ones. I also changed the original exhaust for a stainless steel Miltek system. That about brings us up to date for now. More updates soon......
-
I've not had mine out on the road very much this year, but hoping to get it out a lot more next year!! I had a look at your build thread, the Twilight looks great, I love that colour. Much respect for the job your doing on the Storm, nice to see one getting restored rather than broken. Looking forward to seeing it progress!!
-
Cheers, I'll be selling the old interior at some point so I'll keep you posted.
-
As good as the MJ interior was I had always wanted a set of original electric Recaros, so when Tomi on here advertised a set of half leather seats I snapped them up. The drivers bolster needs the same repair as I had done to the old interior but other than that they are in great condition. I also need to get a set of black leather door cards as the MJ interior is dark grey so the door cards don't match. Here's a few pics of the seats trial fitted. I will be fitting them and wiring them in soon and I will take pics so I can do a detailed how to. More to follow....
-
Next I changed over the tired old wing mirror glass for some new blue tinted items. Old glass New glass I also fitted a set of Audi TT pedals. I picked up a brand new set of gauge pods from VW Heritage. I removed the old cassette holder and trial fitted the pod, I've still to wire them in. More to follow....
-
I was never really happy with the BBS reps on the car so when a set of Schmidt Modernlines 9x16's came up for sale I snapped them up and once they arrived I got my master mechanic to help fit them lol Just for the hell of it, here's one with my A5 daily. More to follow......
-
Ha ha, no worries. Be glad to help out.
-
So, it's been way too long since I updated this thread!! I'll try and bring it all up to date. As I said previously I fitted a leather interior that I picked up off a member on the forum. It had been re-trimmed by MJ Interiors and was in great condition except for one bolster on the drivers seat. At Edition 38 a couple of years ago Dave from Auto-Trim Systems carried out a repair to the bolster All finished! Dave did such a good job on the seat that I got him to do my steering wheel as well. Here's how it looked before And a couple of it finished. I couldn't believe the difference, looked like a brand new wheel. More to follow....
-
Only just saw this post. That was mine, in at the garage for its MOT.
-
Hi guys, I'm after a set of front and rear black leather doorcards. Must be for face lift model with the electric window switch on the door pods. Thanks Kenny
-
AUDIOSCAPE corrado sound system ( ALPINE, FOCAL , INFINITY and more) - SOLD
k6kny replied to tomi's topic in Parts for Sale
Hey Tomi, I'll take the whole lot. I'll PM you. Cheers Kenny -
FS: Half leather recaro seats, in very good condition
k6kny replied to tomi's topic in Parts for Sale
Hi Tomi, I'm interested in the seats, how much to ship to Glasgow, Scotland? Thanks Kenny -
Payment sent for the gear knob and door handle inserts. Cheers Kenny
-
Payment sent for the gear knob and door handle inserts. Cheers Kenny
-
I'll take the gear knob and leather door handle inserts, if they're still available?
