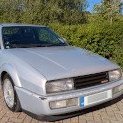
ProdigalSon 1 Posted July 29, 2007 Having owned a rather lovely Aqua Pearl Blue '91 G60 a few years ago, when my Audi 80 was written off in May, my good mate CazzaVR didn't have to twist my arm much to get me to look at buying another Corrado... Needless to say I have now bought a 'stock' G60 in apparently very decent condition :D from a very nice chap near Cirencester about a week ago, after looking at a few examples It is a '92 K-reg (late exterior) in Satin Silver, with ABS and black leather electric Recaros 8) It is totally stock except for the fog lights, which have been removed and neatly blanked with mesh as the previous owner lived in the country and they kept getting chipped and smashed(!) and the wipers, which I upgraded to Lupo/aero wipers on Friday :) "I can see"! However, the engine has done nearly 170k miles, with a single charger rebuild at 85k, so I'm off to G-Werks tomorrow morning for a charger overhaul, a stand-alone oil supply for it, advice, and maybe some other nice bits too! My immediate wish list includes a set of coilovers so it doesn't look quite so much like a 4x4 :lol: a 68mm pulley and chip (SNS/G-Werks), and perhaps an oil cooler and/or chargecooler for good measure... My old G60 had some kind of US tuner chip to go with its 68mm pulley (never found out which one), so the current drive feels a bit weak in comparison :( ... Not for long though :D Here are some pics, taken after a good old clean today :wink: DSC4581.jpg[/attachment:3b60b] ETKA Corrado.pdfDSC4582.jpg[/attachment:3b60b] stromlaufplan_gamma4.pdfDSC4584.jpg[/attachment:3b60b] Corrado92.pdfDSC4586.jpg[/attachment:3b60b] 2.8l 24v Climatronic system.pdfDSC4590.jpg[/attachment:3b60b] passat climatronic wiring diags.pdfDSC4594.jpg[/attachment:3b60b] climatronic wiring-Golf from May 01.pdfDSC4598.jpg[/attachment:3b60b] UPDATE: Maybe the ABS won't be working for much longer... :( Drove home through some drizzle and puddles and the ABS warning light suddenly came on :shock: But if I turn off and restart the engine, the ABS light goes out, then comes back on a while later - ABS does work when the light is off, but doesn't even try to work when the light is on... Also noticed a clicking noise from the ABS unit in the engine bay, which was causing brake line pressure to modulate on the rear left wheel (could feel it with a finger on that line) - a dodgy sensor there perhaps? Any ideas? Will run it by the G-Werks guys, but hope it's not the pump as it's mega£££ if I recall correctly. Anyone with 2x2 VAG Com capabilities in the Oxford area? Quote Share this post Link to post Share on other sites
Goldie 2 Posted July 29, 2007 Looks really nice, silver and black recaros is a good find and that is a late G60, will be in very safe hands down at Gwerks.. Get the fogs back in... :) Enjoy it... Quote Share this post Link to post Share on other sites
ProdigalSon 1 Posted July 29, 2007 Thanks Goldie, wasn't sure about the silver until I saw it in the flesh - kind of a whitish-blue silver, if you know what I mean. The Recaros just sealed it for me :D CazzaVR has already suggested I get the rims refurbed (they could use it!) and painted: satin black centres with a silver lip! 8) Oh yeah, forgot to say that I'll be putting the fogs back in - not too many country roads in the middle of Oxford, so not worried about stone chips! Already enjoying it immensely, and looking forward to many years of exhilarating driving :D Just hope the ABS doesn't go kaput on me :neutral: I'll make a post-G-Werks report probably tomorrow :wink: Quote Share this post Link to post Share on other sites
Mave 0 Posted July 29, 2007 Well done on the purchase, it looks really damn nice 8) Quote Share this post Link to post Share on other sites
ProdigalSon 1 Posted July 30, 2007 Thanks, it's amazing what a bit of spit and polish can do (courtesy of our friends at Autoglym)! :wink: Quote Share this post Link to post Share on other sites
Mr Sands 0 Posted July 30, 2007 Looks absolutely lovely. Really rare colour, really headturning and super interior. Great find! :) Quote Share this post Link to post Share on other sites
ProdigalSon 1 Posted July 31, 2007 Thanks guys :) Details of yesterday's G-Werks trip to go up tonight, including pics :wink: Quote Share this post Link to post Share on other sites
Jules 0 Posted July 31, 2007 I just love silver Corrado's....very nice :) Quote Share this post Link to post Share on other sites
ProdigalSon 1 Posted July 31, 2007 OK, here's the write-up of the trip to G-Werks yesterday... WARNING - THIS POST CONTAINS PHOTOS OF A CORRADO ENGINE BAY IN ADVANCED STATE OF DECAY INCLUDING EXPLICIT RUSTING You have been warned! :wink: OK, so as soon as I arrive, Daz starts to remove the charger for its rebuild, but has to drill out a screw - not a good sign :( Corrado conversion V2 (3).pdf_DSC4609.jpg[/attachment:08b2b] Apart from that and a stiff headlight screw, the bits come off easily, and an initial view of the charger state looks promising... Book1.pdf_DSC4615.jpg[/attachment:08b2b] Once he's cracked it open it doesn't look bad, considering it's done 170k on a single rebuild - 85k ago! stromlaufplan_gamma4.pdf_DSC4620.jpg[/attachment:08b2b] Closer inspection showed that the seals were quite worn and beginning to lift, and one of the oils seals was raised, possibly about to blow... ETKA Corrado.pdf_DSC4621.jpg[/attachment:08b2b] So looks like I caught it in time :) stromlaufplan_gamma4.pdf_DSC4623.jpg[/attachment:08b2b] As the front end was up I removed a wheel to check what I thought was brake pad squeal - Daz disassembled it and filed/copper greased the bits - job done Corrado92.pdf_DSC4626.jpg[/attachment:08b2b] While the charger was soaking in degreaser, Daz removed the ECU and removed the stock chip passat climatronic wiring diags.pdf_DSC4628.jpg[/attachment:08b2b] And all of a sudden there's a G-Werks special sitting there :wink: climatronic wiring-Golf from May 01.pdf_DSC4632.jpg[/attachment:08b2b] The cleaned up charger has new grease in its bearings, and new apex seals fitted 2.8l 24v Climatronic system.pdf_DSC4633.jpg[/attachment:08b2b] Then put back together with a generous squirt of lube :lol: _DSC4643.jpg[/attachment:08b2b] Continued below... Quote Share this post Link to post Share on other sites
ProdigalSon 1 Posted July 31, 2007 And the charger is back in place, putting the rest of the engine bay to shame :wink: Oh, and what's that shiny silver pulley? It looks like a 68mm - how did that get there? :) Corrado92.pdf_DSC4664.jpg[/attachment:2fb8d] And I thought that they were specially designed red blanking caps for the charger inlets... :oops: Anyway, in the meantime, Steve from Pitstop Developments had been measuring up for a stand-alone oil supply system - tricky part was where to fit the sump! However, he managed to fab a bracket to hold it between the relays and battery (this pic taken before it was bolted into position): passat climatronic wiring diags.pdf_DSC4636.jpg[/attachment:2fb8d] Immediately below the sump he fitted an inline gauze filter (the red and blue bit!) to stop particles from being pumped back though the charger climatronic wiring-Golf from May 01.pdf_DSC4637.jpg[/attachment:2fb8d] From there the oil line leads to the 8psi pump mounted on the inside of the bumper (warning - this photo shows explicit rusting :shock: ) 2.8l 24v Climatronic system.pdf_DSC4660.jpg[/attachment:2fb8d] And then to the charger oil inlet, with the outlet (pictured) returning to the sump _DSC4665.jpg[/attachment:2fb8d] Armed with a set of braided oil cables and threaded connectors, Steve connected the supply full-circle, and primed it with 0W30 grade oil. Clean, cool oil for the newly refurbed charger :D The pump is on the switched 12V and makes a quiet 'tic-tic-tic' noise when you turn the electrics on. The charger still gets hotter than I'd like it to (maybe heat soak from the engine via mounting bracket), so perhaps I'll just have to bite the bullet and get that chargecooler fitted! 8) Once this was all done, Daz and I took a ride to check that the fueling was OK with the new setup, and back at G-Werks he checked that blue sensor thing in the side of the boost pipe... He gave the all clear and warned me to go easy for the first 400 miles (only 250 to go now :D) Once it's bedded in I'll be taking her to the local rolling road to get some dynos done - watch this space... Anyway, it was a really great day, mainly due to Daz letting me peer over his shoulder and take photos of everything, answering all my questions (from gearboxes to suspension to airflow) and generally being a very easygoing and down to earth guy :D Thanks also to Rob for sorting me out with a few more bits which I'll get in the post soon, and thanks to Steve from Pitstop for working around the charger rebuild as much as possible and getting it all fab'd and fitted before 5pm. Next up on the wishlist - FK coilovers, barrel chargecooler, and refurbed rims (matt black centres/silver lips?) Quote Share this post Link to post Share on other sites
Goldie 2 Posted July 31, 2007 Quite a days work there, good stuff.... Quote Share this post Link to post Share on other sites
boost monkey 0 Posted July 31, 2007 Wow, what elite axle stands you have and such a nice person who helped you that day! This was me and him playing, I'm pretty sure Daz wouldn't use £10 a pair Halfords axle stand! 8) Quote Share this post Link to post Share on other sites
ProdigalSon 1 Posted July 31, 2007 Cheeky monkey! I think Daz saves the chromed axle stands for sweeter cars than mine... :wink: Quote Share this post Link to post Share on other sites
CazzaVR 0 Posted August 4, 2007 Great pics, Andy :) Really starting to take shape. G is being very understanding about all this! Gonna pop down this week sometime? Would be very interested to see how the tweeked G compares to my standard VR for speed... Quote Share this post Link to post Share on other sites
boost monkey 0 Posted August 4, 2007 CazzaVR, Prodigal is in france all week although the G-siddy is still outside (under my supervision?) G didn't get clued in until recently, I think there were sparks after the G werks trip! :shock: Quote Share this post Link to post Share on other sites
boost monkey 0 Posted August 4, 2007 soz, forgot to add the Lader isn't run in since it's rebuild yet, some 200 something miles to go until WOT can occur! :( Quote Share this post Link to post Share on other sites
CazzaVR 0 Posted August 5, 2007 Under your 'supervision,' eh Jon? :lol: ;) Your bro is very trusting! You'll have to pop down with Andy sometime- for some VW tinkering ;) Quote Share this post Link to post Share on other sites
boost monkey 0 Posted August 5, 2007 Ha ha, perhaps a bit naive? Good job i'm not insured on it! He actually asked me if I wanted to change the rear discs while he was away, cheeky git! Would be good to meet up again, I wanna see what a corrado vr handles like. I think the jetta engine will go soon, then it'll be off the road whilst I decide...hmm. Quote Share this post Link to post Share on other sites
Jay2 0 Posted August 5, 2007 Would be interested in knowing how the car gets on, once everything is run in, looking at a trip to G-Werks sometime next year for a charger re-build and Chip/Pulley upgrade. Rough idea of costing? :? Quote Share this post Link to post Share on other sites
ProdigalSon 1 Posted August 11, 2007 Would be interested in knowing how the car gets on, once everything is run in, looking at a trip to G-Werks sometime next year for a charger re-build and Chip/Pulley upgrade. Rough idea of costing? :? Hi Jay, I've got the receipts here: Charger rebuild £385 (that's for a couriered charger, it costs about £65 more to just drive up, get it removed, rebuilt and refitted to the car) Chip and pulley £190 (not sure if that includes the labour, at about £45/hour, I think it took an hour-ish) Both great value and definitely worth it, but watch this space for dyno plots after it's run-in and been on the rolling road - I still have 200 miles to do before then! :( Just got back from holiday and want to take it out for a blast, but should treat it carefully for a bit longer so that the new seals bed in properly... Then it's all go :D :evil: Quote Share this post Link to post Share on other sites
Jay2 0 Posted August 12, 2007 Thanks mate, thats a big help for budgeting for a trip down next year. It must be murder having to keep your foot off the gas. I suppose one benefit of taking the car down, is that it would nearly be bedded in by the time got back to Yorkshire. :D Quote Share this post Link to post Share on other sites
ProdigalSon 1 Posted August 12, 2007 Thanks mate, thats a big help for budgeting for a trip down next year. It must be murder having to keep your foot off the gas. I suppose one benefit of taking the car down, is that it would nearly be bedded in by the time got back to Yorkshire. :D No worries :wink: Yes, it is very hard work to keep it low - especially when having to manouevre around crazy (slow) drivers :D One consolation is that it is much more responsive at low revs/part throttle than before, so it does feel nice even when driving sensibly... My run back from G-Werks was only 120 miles :( Seriously considered going home via Birmingham! Hope to have it run in and dyno'd by the end of August - watch this space. Quote Share this post Link to post Share on other sites
ProdigalSon 1 Posted August 15, 2007 soz, forgot to add the Lader isn't run in since it's rebuild yet, some 200 something miles to go until WOT can occur! :( By the end of play tomorrow, 400 probationary miles will have been covered, and WOT will be achieved, oh yes. :) Quote Share this post Link to post Share on other sites
ProdigalSon 1 Posted August 31, 2007 Update - the coolant system decided to protest at the newfound speed and engine power, and popped a hernia a couple of weekends ago, weeing coolant into the engine bay :( It was quickly and effectively 'barned up' with gaffer, a piece of plastic from a washing-up liquid bottle and a couple of tie wraps, but this was the third such fix to the hoses (two were made by previous owners). So, a Samco coolant hose kit order was placed with G-Werks (due in a couple of weeks now), and all-new 70C thermostat, plastic flanges and expansion tank are also lined up. Decided to sort out rear brakes in the meantime, as the pads were obviously not making good contact with the disk - scratchy rust spots at inside and outside edges. When removing the calipers last weekend, the bleed nipple sheared clean off one side (and the piston was well stiff too), so decided to replace the calipers as well as the disks... Ordered parts earlier this week from my local VW dealer and got 25% off (I asked about Parts Club discount), plus an instant surcharge rebate of £63 IIRC - no questions asked :D So, off to Halfords tonight for caliper paint and then we'll be fitting them tomorrow :) Will try to take some pics of the action too :wink: 8) Quote Share this post Link to post Share on other sites
boost monkey 0 Posted September 2, 2007 ^^^ front N/S bleed nipple PWNT yesterday, so awaiting new caliper #3. :( :( :( Quote Share this post Link to post Share on other sites