
paddy26
-
Content Count
258 -
Joined
-
Last visited
-
Days Won
3
Posts posted by paddy26
-
-
the hub is part of the disc on the rear, so you just need new 4x100 discs.
For the front i think you just need the 4x100 hub, the cv joint from the 4x100 car and new bearings for when you press the hub into the stub axle.
you'd need to check that the 4x100 cv joint will work with the vr driveshaft.
You could then drill your front discs to 4x100 or find a different front brake setup.
-
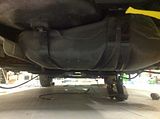
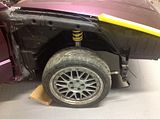
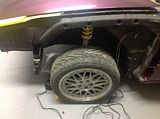
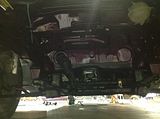
Got the rear of the car on axle stands now so here are some pics of the underneath of the car and of the wheel arches.
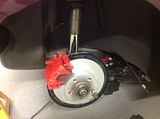
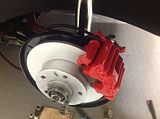
Last weekend I fitted the rear carriers, calipers, discs and pads.
I also connected handbrake cables and then connected braided hoses to the calipers.
I will join the rear calipers lines with a t-piece and then run a braided line into the car, under the rear seat.
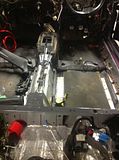
i will then run a hard line up the tunnel to the bias valve and from there through the bulkhead to the master cylinder. You can just make it out in this pic
I'll also be fitting the battery in the boot, so i ordered a 0AWG amp wiring kit and ran the heavy cable from the boot to where the abs controller used to be mounted. I'll be fitting a distribution block here and i'll also be fitting the relays for the side lights, low beam, high beam and fogs here.
Removed the front wings
and connected the sunroof drain pipes
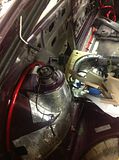
Here's a pic of the engine bay at the moment. I'll get some better ones next time the bonnet's up.
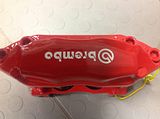
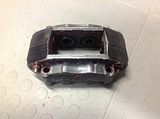
And here's my failed attempt at brembo refurb. Nothing worse than having to redo jobs :(
WARNING: dont lacquer on top of hammerite paint, unless it's specifically designed for the job. i think that 2K lacquer works ok.
starting again
More updates later in the week.
-
-
Dubshed is on 7th April so you should set that as your new deadline....
-
The bead blasting is a great job.
I have a few bits I'll be getting done aswell.
How's the head rebuild coming along?
-
the wire on top of the brake fluid reservoir is for the low brake fluid level sensor. It has nothing to do with the abs.
sounds like a sensor is gone on one of the front hubs or there is a damaged wire.
-
Red arrow - thanks for the door handles. Exactly as described and very well packaged. Took me 5 mins to open it!
\Paddy
-
Car looks really well in that last pic. Some really nice mods done.
-
-
Got a few bits done at the weekend.
Pedal box is now back in the car and the fuse box is hopefully refitted for the last time.
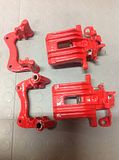
I cleaned down the rear calipers/carriers and gearbox ready for painting.
Sorted through some of the engine bay looms and removed all the old tape.
Got the carpet cleaned aswell.
Before:
After - 1 of them wasn't fully dry as it was just out of the washing machine:
I think I have a mk3 golf as a donor car. I'm going to try get the brake booster and master cylinder from that and also the plastic fuel lines that run from the pump to the bay.
Question: Can you replace the banjo bolts on the plastic pipe? Possibly by heating the end in boiling water?
-
is the illumination working on the other dash switches and the sunroof switch?
Does the sunroof work?
-
If you'll post to Ireland for that price I'll take it.
\Paddy
-
If these are original vw handles and will work with the corrado door locks then ill take them at the asking price.
I'm from Southern Ireland but can give you an address in Northern Ireland if the postage costs are too much.
\Paddy
-
Can you still work the total closure from the door lock?
If you do set your multimeter to volts.
Connect 1 lead to ground and the other lead to the "lock signal" wire.
Work the total closure from the door lock and you should get 12v (or close) on the multimeter.
This will confirm that you have correctly located the lock signal wire.
Then use your multimeter to check that you have 12v in your "power" wire.
Get a spare piece of wire and strip both ends. Connect 1 end to the lock signal wire and hold the other end to the power wire. The total closure should then work.
You can then connect up the relay.
Can you post a pic of the circuit dig on the top of your relay?
If its the same as the relay in the link then:
Connect the 12v power wire to pins 30 and 85
Connect the green wire to 86
Connect the lock signal wire to 87
\Paddy
-
Any more inputs before I clean my abs booster and master cylinder and install them over the weekend?
\Paddy
-
Thanks Supercharged.
I'm doing a complete removal.
I'm redoing all the engine wiring looms and the abs loom is already gone.
sensors and rings in the hubs are already gone.
i'm fitting stainless hoses and new hard lines, with an adjustable brake bias valve for the rear brakes.
i was going to reuse the master cylinder aswell and just block up the ports i dont need.
-
Anyone?
I hope to start work on this at the weekend.
\Paddy
-
I had this in my build thread but figured it would get more views here.
As title says, how does it work?
I know how a non abs booster works, but I'm not sure what's different for an abs one.
As part of my restoration I will be removing the abs system from the car.
To keep costs down I'd like to reuse my brake booster and master cylinder if possible.
I have ordered a brake bias valve which I will fit inside the car so I can adjust the rear brakes as needed.
I have already removed the original proportioning valve from the rear axle as it was rusted and not working anyway.
-
Thanks Jim. Heater matrix has been replaced and i've a new fan motor in aswell.
Hopefully i'll get to test the interior electrics and rear light this evening. Then i can wrap that set of looms and tick another job off the very long list.
-
As title says, how does it work?
I know how a non abs booster works, but I'm not sure what's different for an abs one.
As part of my restoration I will be removing the abs system from the car.
To keep costs down I'd like to reuse my brake booster and master cylinder if possible.
I have ordered a brake bias valve which I will fit inside the car so I can adjust the rear brakes as needed.
I have already removed the original proportioning valve from the rear axle as it was rusted and not working anyway.
-
I've spent a lot of time over the past week on the corrado but haven't much to show for it.
I've refurbed the heater box and cleaned all the ductwork. I've had it in and out of the car a few times, along with the dash, while trying to tidy up the wiring looms.
I've most of the interior looms tidied and ill start working on the headlight looms shortly.
I'd like to test all the interior electrics first before I wrap the looms, as it will be much easier to trace the wires.
Hopefully I'll get that done this week.
I'm also redoing the DBW pedal bracket so it doesn't foul the fuse box and footrest.
-
We have a similar problem in Ireland.
-
Thanks Abdul. I'll use photobucket for now and I'll look into getting tapatalk setup.
Here are the pics before I started working on it yesterday.
I didn't get too much done today as I had to search through boxes for parts/bolts
I greased the sunroof mechanism and fitted it to the car. I'll leave the dust as a "protection layer" for now!
I got the wiring looms fitted to the boot lid.
Regreased the mechanism for the spoiler and fitted it.
Fitted the boot lock and got the central locking pump connected.
Fitted my all red rear lights.
The pic is pretty bad as it was dark out and I've no lights up in that section of the garage yet. I might do that today.
I'll be installing all the glass towards the end of the project.
To finish the boot lid I need to locate a good number plate plinth.
The interior boot lid trims are scratched and dirty so I'll be respraying them before I fit them.
I need to make a gasket for the number plate lights as mine is perished.
I also need to find the 2 bolts which hold the spoiler on!
-
Anyone know how to upload photos taken on ipad?
Do they need to be resized?



Jimmys 16v
in Members Gallery
Posted
Looks real well. I like the contrast of the orange indicators against the white.
Best of luck with it.