Keyo 47 Posted December 29, 2020 (edited) Bottom of door seal. How do you get these off- do you just pull the clips off the bottom - can you do it with the doorcard still on ? Cheers. Edited December 29, 2020 by Keyo Quote Share this post Link to post Share on other sites
Keyo 47 Posted December 29, 2020 (edited) 4 hours ago, 1xshaunx1 said: Double sided sticky membrane. Got this in 2012 by the looks of it. It’s like a super sticky membrane that is really useful for things like rubber bits as in the door jar and hatch You can still buy those door hinge seals new - same as a MK2 golf and can buy from VAG. Also came on some Audi, they come flat but when you shut the door it presses them. https://www.ebay.co.uk/itm/Audi-ur-quattro-coupe-door-check-strap-gasket-867837267/223908062506?epid=1709535915&hash=item3421f5e52a:g:JR4AAOSwdUtdhJqT Edited December 29, 2020 by Keyo Quote Share this post Link to post Share on other sites
Cressa 43 Posted December 29, 2020 29 minutes ago, Keyo said: Bottom of door seal. How do you get these off- do you just pull the clips off the bottom - can you do it with the doorcard still on ? Cheers. You dont need to remove the door cards they are at the very bottom of the door. Remove the clips, but they also have an adhesive tape on the back. 👍 which I'm guessing Shaun has used his posh tape on Quote Share this post Link to post Share on other sites
1xshaunx1 27 Posted December 29, 2020 Cheers for that but a bit too late. The door is officially finished, bar the card. Quote Share this post Link to post Share on other sites
1xshaunx1 27 Posted December 29, 2020 1 minute ago, Cressa said: You dont need to remove the door cards they are at the very bottom of the door. Remove the clips, but they also have an adhesive tape on the back. 👍 which I'm guessing Shaun has used his posh tape on There are 5 clip things and double sided adhesive as Cressa says. Beware the clips are fragile as is everything. They pop over a mushroom thing to secure. Used normal black foamed double sided tape to refit, about the same thickness as I took off the seals Quote Share this post Link to post Share on other sites
Keyo 47 Posted December 29, 2020 (edited) 31 minutes ago, Cressa said: You dont need to remove the door cards they are at the very bottom of the door. Remove the clips, but they also have an adhesive tape on the back. 👍 which I'm guessing Shaun has used his posh tape on Thanks for the replys Sure if you look at the yellow tape on the back looks same a Shaun. I actually have a nos bottom door seal one to put on - can still buy the press studs = its odd on etka the seal ending with 13 is for left but the right one is just blank with no part number- are they the same seal for both sides. Update left ends with 13 and right 14 - both obsolete as a dodo. Edited December 29, 2020 by Keyo Quote Share this post Link to post Share on other sites
1xshaunx1 27 Posted December 29, 2020 19 minutes ago, Keyo said: Thanks for the replys Sure if you look at the yellow tape on the back looks same a Shaun. I actually have a nos bottom door seal one to put on - can still buy the press studs = its odd on etka the seal ending with 13 is for left but the right one is just blank with no part number- are they the same seal for both sides. Definitely not the same seal, they are handed. There are two mushrooms for clips close together at the front of the door. I saved money and cleaned mine up with Gumi Pflege, after all they are under the door. Quote Share this post Link to post Share on other sites
Keyo 47 Posted December 29, 2020 My drivers one the bottom part of the seal has spit an inch or two from the end - same with the left- Im going to fit the new one to passenger side and check out my spare doors in the shed if the drivers door has a good used one. I think they play quiet an important job as they stop water coming in and sitting on the internal sills- your decals look good- have some to put on myself- going to let the paint cure for 30 days and let the gases escape from the paint before sealing it with the sill protective trim as premature fitting before gases escape can cause bubbling. Quote Share this post Link to post Share on other sites
1xshaunx1 27 Posted December 29, 2020 5 minutes ago, Keyo said: My drivers one the bottom part of the seal has spit an inch or two from the end - same with the left- Im going to fit the new one to passenger side and check out my spare doors in the shed if the drivers door has a good used one. I think they play quiet an important job as they stop water coming in and sitting on the internal sills- your decals look good- have some to put on myself- going to let the paint cure for 30 days and let the gases escape from the paint before sealing it with the sill protective trim as premature fitting before gases escape can cause bubbling. You do right waiting a while, it can’t hurt, I’ve done the same. The paint was still a bit “soft” after a couple of weeks, that’s why I held off for a bit Quote Share this post Link to post Share on other sites
Keyo 47 Posted December 29, 2020 12 minutes ago, 1xshaunx1 said: You do right waiting a while, it can’t hurt, I’ve done the same. The paint was still a bit “soft” after a couple of weeks, that’s why I held off for a bit Good practice for sure- I have actually had bubbling before through premature decal application so leant the hard way. Quote Share this post Link to post Share on other sites
Cressa 43 Posted February 7, 2021 How far on with the car are you Shaun? Quote Share this post Link to post Share on other sites
1xshaunx1 27 Posted February 7, 2021 12 minutes ago, Cressa said: How far on with the car are you Shaun? Got both doors and roof all put back together and started on the front end. Then got busy at work and had a few weeks off the car, I think I’m dreading the glass installation shenanigans and have come to a stop while my enthusiasm builds again. Weather isn’t helping to get me going either, not like it’s driving weather or that you are allowed to far or anywhere anyway. Quote Share this post Link to post Share on other sites
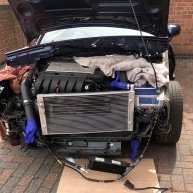
1xshaunx1 27 Posted April 4, 2021 Finally got some mojo and put my front end together and I had a look at my wiring issues which involved messing with the rats nest, the ABS plugs and Quote Share this post Link to post Share on other sites
1xshaunx1 27 Posted April 4, 2021 Unexpectedly total success. First time the ABS light is working properly in my ownership and it’s the first time I’ve seen the fuse box back in position since I bought the car Quote Share this post Link to post Share on other sites
fla 9 Posted April 4, 2021 excellent! Nice accelerator pedal there - looks like it fits nicely Quote Share this post Link to post Share on other sites
1xshaunx1 27 Posted April 4, 2021 39 minutes ago, fla said: excellent! Nice accelerator pedal there - looks like it fits nicely Cheers Hasan, Yes it does fit well. off eBay T4 I think Quote Share this post Link to post Share on other sites
1xshaunx1 27 Posted May 8, 2021 Had the glass put in yesterday. It appears I had good reason to be worried about the front screen going in. Didn’t really look at it when they’d done as it was covered in tape and I needed a break from the ordeal. So just getting my self mentally ready to go and take the tape off and have a good look at the final results. Quote Share this post Link to post Share on other sites
Cressa 43 Posted May 8, 2021 🤞🤞I'm sure it will be great Quote Share this post Link to post Share on other sites
ABV-VR6 12 Posted May 8, 2021 Good luck with the big reveal and keep us posted mate! Quote Share this post Link to post Share on other sites
Cressa 43 Posted May 8, 2021 Cmon you 3, post up on the newbies return 😂😂 And pics please shaun Quote Share this post Link to post Share on other sites
1xshaunx1 27 Posted May 9, 2021 Unfortunately it wasn’t the best result. The front screen wants doing again, but not now I’m going to carry on putting it together have a summer and get it sorted in the winter.The rest of the glass looks ace. I just want my car back now. Tried fitting the dab arial I got off eBay it doesn’t. It wants to sit too high, I may have to dremel something. I did get my rain tray in and washer jets mounted in it so they spray from under the bonnet. More time also went on some unhealthy looking wiring attached to the headlight switch loom which plugs in the fuse box next to the wiper motor loom, guess how I know that. But finally I think I’m ready to put the new bloody carpet in which probably won’t fit and drive me to distraction as much as the rest of it. Quote Share this post Link to post Share on other sites
1xshaunx1 27 Posted May 9, 2021 Has anybody else tried one of these. It seems to have sticky out bits that stop it sitting flush with the roof. Quote Share this post Link to post Share on other sites
paddy26 3 Posted May 9, 2021 Can the silver part be turned the other way? Quote Share this post Link to post Share on other sites
Cressa 43 Posted May 9, 2021 Found this picture of my Hirschmann aerial. Doesnt seem to have them when zoomed in !! Quote Share this post Link to post Share on other sites