Bruno 4 Posted April 21, 2021 (edited) Rear beam needs to be mounted with both the body hangers loose as the beam eyes are mounted up. Dont torque up the beam eyes, or the hanger bolts until the the car has dropped and rolled a bit. Torque up with the wheels on the ground. That should lead to automatic squaring of the beam. Actually - has anybody noticed this before - the hangers for the rear beam are somewhat slotted on purpose. I wonder if, given the torque levels used, this was deliberate, to allow some adjustment - probably no more than 0.5 degrees (looking at the size of the slots). So, if this is correct, you are right, there is some room for adjustment. I spoke to a master tech at a VW garage just now and he said the A2 chassis (MK2s-MKivs) including the Corrado all had the slots built into the hangers to enable the rear axle to be fitted without hassle, but also confirmed that those slots come in useful, offering a "shave of adjustment ". The front K frame is more interesting - am doing it myself right now - the crucial part seems to be in getting the steering rack properly marked and resited on the K-frame when bolted in; the steering column properly settled, camber bolts being used (if needed) to get the front geometry right. Dont set the geometry until the dampers have settled for about 30 miles. The alignment team can only adjust the front wheels- but they may need to do it 3 times before it sits right. Edited April 22, 2021 by Bruno some information from VAG techs added 2 Quote Share this post Link to post Share on other sites
ABV-VR6 12 Posted April 23, 2021 Bruno did a really good job at resuming how to adjust the rear beam. I think the rear is straight forward, it's the front that present more things to adjust. I think I'll leave this part to professionals since everything as been changed. Cheers! Quote Share this post Link to post Share on other sites
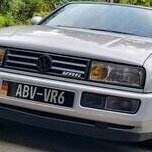
ABV-VR6 12 Posted April 23, 2021 On 4/21/2021 at 2:06 AM, MJA said: Ahh looks great - there is something hugely satisfying knowing parts like this are in tip top shape. I joined the Candian Corrado facebook page and saw this and thought it was you - I did comment as well. Thanks mate! I found out about that Canadian Corrado Facebook only a few months ago and I'm Canadian! I'm not a facebook person but I friend recommended it for parts etc... I used to be on the official website that had tons of good information but it's sadly been down for many years... Quote Share this post Link to post Share on other sites
g0ldf1ng3r 13 Posted April 23, 2021 5 hours ago, ABV-VR6 said: Thanks mate! I found out about that Canadian Corrado Facebook only a few months ago and I'm Canadian! I'm not a facebook person but I friend recommended it for parts etc... I used to be on the official website that had tons of good information but it's sadly been down for many years... the heater matrix dash out removal guide i have saved is a modified version of the one that came from the canadian corrado website a long time ago i always send it out to anyone who asks as it has loads of pictures & getting the actual matrix out is so much easier once the dash is removed - plus you can reline the airbox whilst in there having done it 3 times im still not sure how people manage to do it with dash still in lol Quote Share this post Link to post Share on other sites
fendervg 29 Posted April 23, 2021 I did it dash in, but would always now advise doing it dash out for the small amount of extra effort required, as there is so much more access for getting the heater box in and out. See, it's so easy to do on a Mk2 - just the dash under trays and centre console have to come out - oh, yeah, they actually have a console that can be removed! Quote Share this post Link to post Share on other sites
fla 9 Posted April 23, 2021 2 hours ago, g0ldf1ng3r said: the heater matrix dash out removal guide i have saved is a modified version of the one that came from the canadian corrado website a long time ago i always send it out to anyone who asks as it has loads of pictures & getting the actual matrix out is so much easier once the dash is removed - plus you can reline the airbox whilst in there having done it 3 times im still not sure how people manage to do it with dash still in lol Could you add this to the wiki at all? I'd be interested in seeing it. Shame about the Canadian Corrado site - some cracking info there, that seems to have been lost forever. Tried searching on the wayback machine but couldn't find anything. Dennis there was a real corrado genius, and also seemed like a nice helpful chap too. Quote Share this post Link to post Share on other sites
dragon green 4 Posted April 23, 2021 Could you add this to the wiki at all? I'd be interested in seeing it. Shame about the Canadian Corrado site - some cracking info there, that seems to have been lost forever. Tried searching on the wayback machine but couldn't find anything. Dennis there was a real corrado genius, and also seemed like a nice helpful chap too.Put it in the (Archive) Wiki Submissions & Collaboration, Quote Share this post Link to post Share on other sites
g0ldf1ng3r 13 Posted April 23, 2021 K will try & get it uploaded soon Quote Share this post Link to post Share on other sites
Bruno 4 Posted April 23, 2021 I have a copy of that heater matrix change guide from the Canada forum as well. @ g0ldf1ng3r PM me if you want me to mail you the PDF. Quote Share this post Link to post Share on other sites
ABV-VR6 12 Posted July 17, 2021 Alright, time for another update on my project! I've been doing mostly prep work and I think I'm getting to the point where the rewarding part is around the corner which is putting the engine back in the car. I'm aiming for winter and hopefully next spring it's up and running. Next week, the head is going for a port and polish, HD springs and lighter cam followers to match my newly acquired DRC 268 I will be also dropping my transmission which I completely dismantled. Upgrades will be all new OEM bearings, seals, synchros 1 & 2 with a 3.94 R&P, a LSD and a taller 5th gear 0.75 At first, I wanted to put it all back together myself but the shim parts seems very specialize and required tools that I don't have so I'll leave this to a pro. The block will be dropped next month with new rings, bearings, OEM pump & pan and OEM hardware for everything since it is torqued to yield. I've spent countless of hours prepping all my parts for powder coating, I think everything on the car is powder coated now minus the intake and valve cover which will follow while I'm building the engine back. I did just like before, wire wheels, file, grind but also the parts to begin with have practically no rust on them so that helps. Smoothing the cast is what takes time. I did the rad fan which turned out amazing but I will be upgrading to a stand alone system so I may sell that parts to recoup for the next project. I did a small project on the side, I made a VWMS coilpack which supposedly brings 57% more spark than the OEM while keeping the OEM look. I will pair it with the Phenix spacer. So now, I'm excited to put it all back together and be ready to receive the engine in the winter. I'll leave it to that and go work on it! Cheers to all Quote Share this post Link to post Share on other sites
1xshaunx1 27 Posted July 17, 2021 The coatings look real quality. You’ll certainly notice the hood stay when you pop it open. Quote Share this post Link to post Share on other sites
Keyo 47 Posted July 17, 2021 Looking absolute mint Im guessing this may will be the best car in North America once completed- so what is this vwms coil pack . Quote Share this post Link to post Share on other sites
ABV-VR6 12 Posted July 17, 2021 1 hour ago, 1xshaunx1 said: The coatings look real quality. You’ll certainly notice the hood stay when you pop it open. YES, I trying to do a few different things outside the box mate. If I don't like it, I still have the black one. Quote Share this post Link to post Share on other sites
ABV-VR6 12 Posted July 17, 2021 51 minutes ago, Keyo said: Looking absolute mint Im guessing this may will be the best car in North America once completed- so what is this vwms coil pack . Thank you, means a lot! Here's the link of the VWMS coil pack where I got my source to do it. It was pretty easy to do mate: https://www.vwvortex.com/threads/bosch-motorsport-coilpack-swap-with-stock-management.7584841/ 1 Quote Share this post Link to post Share on other sites
Keyo 47 Posted July 17, 2021 32 minutes ago, ABV-VR6 said: Thank you, means a lot! Here's the link of the VWMS coil pack where I got my source to do it. It was pretty easy to do mate: https://www.vwvortex.com/threads/bosch-motorsport-coilpack-swap-with-stock-management.7584841/ Ah ok the Bosch motorsports coil pack. Quote Share this post Link to post Share on other sites
Cressa 43 Posted July 18, 2021 Mate, your shiny painted collection looks amazing. It will be a shame to have a bonnet on and shutting that lot away. There is a huge amount of time and effort going into your project. Fantastic Quote Share this post Link to post Share on other sites
1xshaunx1 27 Posted July 18, 2021 13 hours ago, ABV-VR6 said: Thank you, means a lot! Here's the link of the VWMS coil pack where I got my source to do it. It was pretty easy to do mate: https://www.vwvortex.com/threads/bosch-motorsport-coilpack-swap-with-stock-management.7584841/ This looks a useful upgrade, I might have a stab at this, where did you get the yellow wires with plug from. Quote Share this post Link to post Share on other sites
ABV-VR6 12 Posted July 18, 2021 6 hours ago, Cressa said: Mate, your shiny painted collection looks amazing. It will be a shame to have a bonnet on and shutting that lot away. There is a huge amount of time and effort going into your project. Fantastic Thanks mate much appreciated. I'm realizing I dream with that car so time and efforts are part of realizing that dream so I do enjoy it. It's shiny and nice for sure but my primary goal with all of this is to preserve the parts in their pristine state as long as it is possible. Cheers! Quote Share this post Link to post Share on other sites
ABV-VR6 12 Posted July 18, 2021 5 hours ago, 1xshaunx1 said: This looks a useful upgrade, I might have a stab at this, where did you get the yellow wires with plug from. Yes, I think so too. And I had an old cracked coilpack which I took the base from. The plug and wires are from the VW dealer VW PN: 4A0 906 234 2.5mm Wiring Repair: 000 979 225 1.0mm Wiring Repair: 000 979 133 You'll need 2 of the 1mm repair wire sections, cut them in a half to feed 3 connectors. Kind of have to be "smart" about cutting them, needs to be strategic so you can reach the one connector that's further. It's all easy to do and source except I had a hard time finding the flag terminals. I do have 50 now though lol, so I can mail you some! But ya, on his "how too" you can see they're kind of loose on the tabs. It's because the tabs are not a standard width for terminals so he went bigger. Me I went smaller (by half a millimeter) was the closest and I barely filed both side of the tabs to make then fit tight and also renew the fresh metal of the tabs. Next improvement I did also is instead of cutting all the tabs straight like he did, I cut the tabs at different height like stairs in order to not get 4 wires on top of each other. That also allows you to tick in the wiring easier under the plastic holder. Bosch motorsports coilpack: https://www.ebay.com/itm/254443085305?epid=230287652&_trkparms=ispr%3D1&hash=item3b3dfd5df9:g:EkQAAOSwmU9dzute&amdata=enc%3AAQAGAAACkPYe5NmHp%2B2JMhMi7yxGiTJkPrKr5t53CooMSQt2orsSg3Ye8yTWgOW7pmE1t838dmdzS%2BAoGk%2FLdyakW1m%2B3ccC%2B7MzF3u80buSSD%2BJYHItogGWmCMpaXYLhVWlzfd09qAqLH6ROMo5ruDV2bQHEgV8fi6CMJ6nj0Qt53FAJL0FtNcId71Ub0pl2Euai8viCzW87L9sn6eXdcnXw1Pcu5weLKaeF4wkXizrH1HDxf96ctgEKEr4sqdeIqyQRgH2S%2FXqysjH1ihRdKGTSAZOcK1EgG7p6OhLGbqInjj9roG0TkmavykpYkOfNiX%2Bi0mYrw1gU07CBlOQW3EbTPrfS1y%2B8rz1fem52XAPZs8aTziKUBITZypFljxZCKaG%2FCZWGMMwGwgxx0NszEP6Qs5wQMLbgZnHGXHluY8UovkpKbLe2IdJ3S2FkMtAKjHvW1WVb04uFPL7e1hgT8i3eXXNmzLz%2Fox%2FZRtCfFb01pJKChR3Pb6ijJrSN1TF8KYBHAar%2Bcp79QEDT96CsNL5Q0fuhVavOpFAhWYuBJexBWqwj2hTGnpcn4ZG%2BHVgC2FrL7OOrD6qjkFXWgOem51XLxuWtSK4G6Abk%2FZK3lJGp4nmr0JWf%2FDN5d2SS%2BF7NGHZdxPXPvebI4QGdhwZuZAbf%2FKY%2BpPBmtibndTI6JRWQMyuD0qaC2D8qM2nxqUvI7R4JA0ys2zkfkR0yL3M%2Fbkkird2Aaq3Frvf%2B%2FbxZdKFfdATKp8aQh34nS%2FngJBsDSQKBRGcD0y1GCf%2F2MejMFGlRnq7r8YAulWd1Fzvlr81aq3nfAGLv1OC4%2FrTXBmiTTG%2B9VYU2qfNmYO2ANjC8XXibSYLR2Chs288ol8ZHcJF9IsNw%2BC8|ampid%3APL_CLK|clp%3A2334524 Quote Share this post Link to post Share on other sites
ABV-VR6 12 Posted July 18, 2021 This is the little modification I did under the plastic bracket to pass the wiring to make it look like it was meant to be. Only down side is that plastic cover clips usually on the oem coilpack at the top. It still clips on the bottom part though. On the Bosch Motorsports you can't clip the top part so you put a drop of plastic epoxy and call it a day. Cheers! Quote Share this post Link to post Share on other sites
ABV-VR6 12 Posted January 27, 2022 Alright, I've been away for a while... Since I dropped my engine off in July, I'm kind of in a stand still... Should get it back end of February, we'll see! So I haven't worked on it too much because of that. I did other couple of small projects like the last one with the coilpack. First, I always hated the way the plastic e-brake cover looks, leather should have been there OEM. I worked hard on a prototype and I'm happy with the results. Looks oem, just the way I think it should have been made in the first place. And I also worked on port matching the exhaust manifolds and down pipe, apparently you get 5 to 7 whp from this. I quite enjoyed the process. That's about it, still waiting and I can't wait to put that engine back on the car. Cheers! Quote Share this post Link to post Share on other sites
_Matt_ 26 Posted January 27, 2022 Nice update, you're right about the handbrake should have been leather. Tell us more about the port matching - is it a dremmel job? Do you go to the edge of the gasket line? Interesting Airbag on your glovebox - does that mean you don't get a glovebox? Not seen that before. Looking forward to hearing about the engine when you get it back. Quote Share this post Link to post Share on other sites
1xshaunx1 27 Posted January 27, 2022 😍 love it. Quote Share this post Link to post Share on other sites
ABV-VR6 12 Posted January 27, 2022 Thanks guys! Ya, unfortunately only the 1995 got the airbags... The passenger one replace the glove box which means no storage except you have have the parcel tray underneath which I don't. And then on the driver side, it's the MK3 steering wheel with airbag that I removed (scared of it tbh). I dug up a 7 years old thread for the porting. I think it's one of the most underrated mod that can be done and cheap also, that's rare 😉 it was done by one of the old school guru on vortex. He does drag with the car and the time saved from this translate to 5/7 WHP. Which is a lot! Materials in the picture, probably spent £100 for everything, porting bits, die grinder with fixed speed, sand drums etc... All from Amazon! The guy where I got the inspiration, he stopped the work kind of rough without sanding. I finished mine with 80 grit for a shiny but mostly better flow. Prepare to spend about 8 hours. The downpipe if you do it, before you start anything, it needs to be back welded like on my picture. First, get them washed professionally, nasty stuff in there. You don't port match exactly to the gasket but leave a 0.5mm to 1mm more so it flows without hitting the next piece. I've used a good mix of what's in the picture. Short porting bit around openings, mainly used the same bit but 6" long to reach all around and deep. I did the rough with one and when it started to not cut as much because it was dull, I've used it all over again to smooth things out. The Flex-hone in 1" was perfect to make the bends and long reach but honestly not necessary. The bends are the hardest since the bit is straight. I didn't "just" port where the gasket meets to ramp it up but I tried to make a slow progression towards it from the deepest I could. I finished by the gasket match, not started with it. I finished all of it with a Dremel (bought the flex shaft extension) with 80 grit drums and cones for the bends. I've read it's possible to do it all with a Dremel but after doing it, I can say that it would do a 1/2 job... That die grinder was on sale and it was the equivalent of £50 mate. I worked on top of a working light, just like drywalling, you need to see what you do and defects shows with shadows... Quote Share this post Link to post Share on other sites
ABV-VR6 12 Posted January 27, 2022 Pics on before the porting work. I also sourced MK3 12V manifolds as they don't have a hole for the EGR which is deleted. Quote Share this post Link to post Share on other sites